Automated flow steps
The Condition step
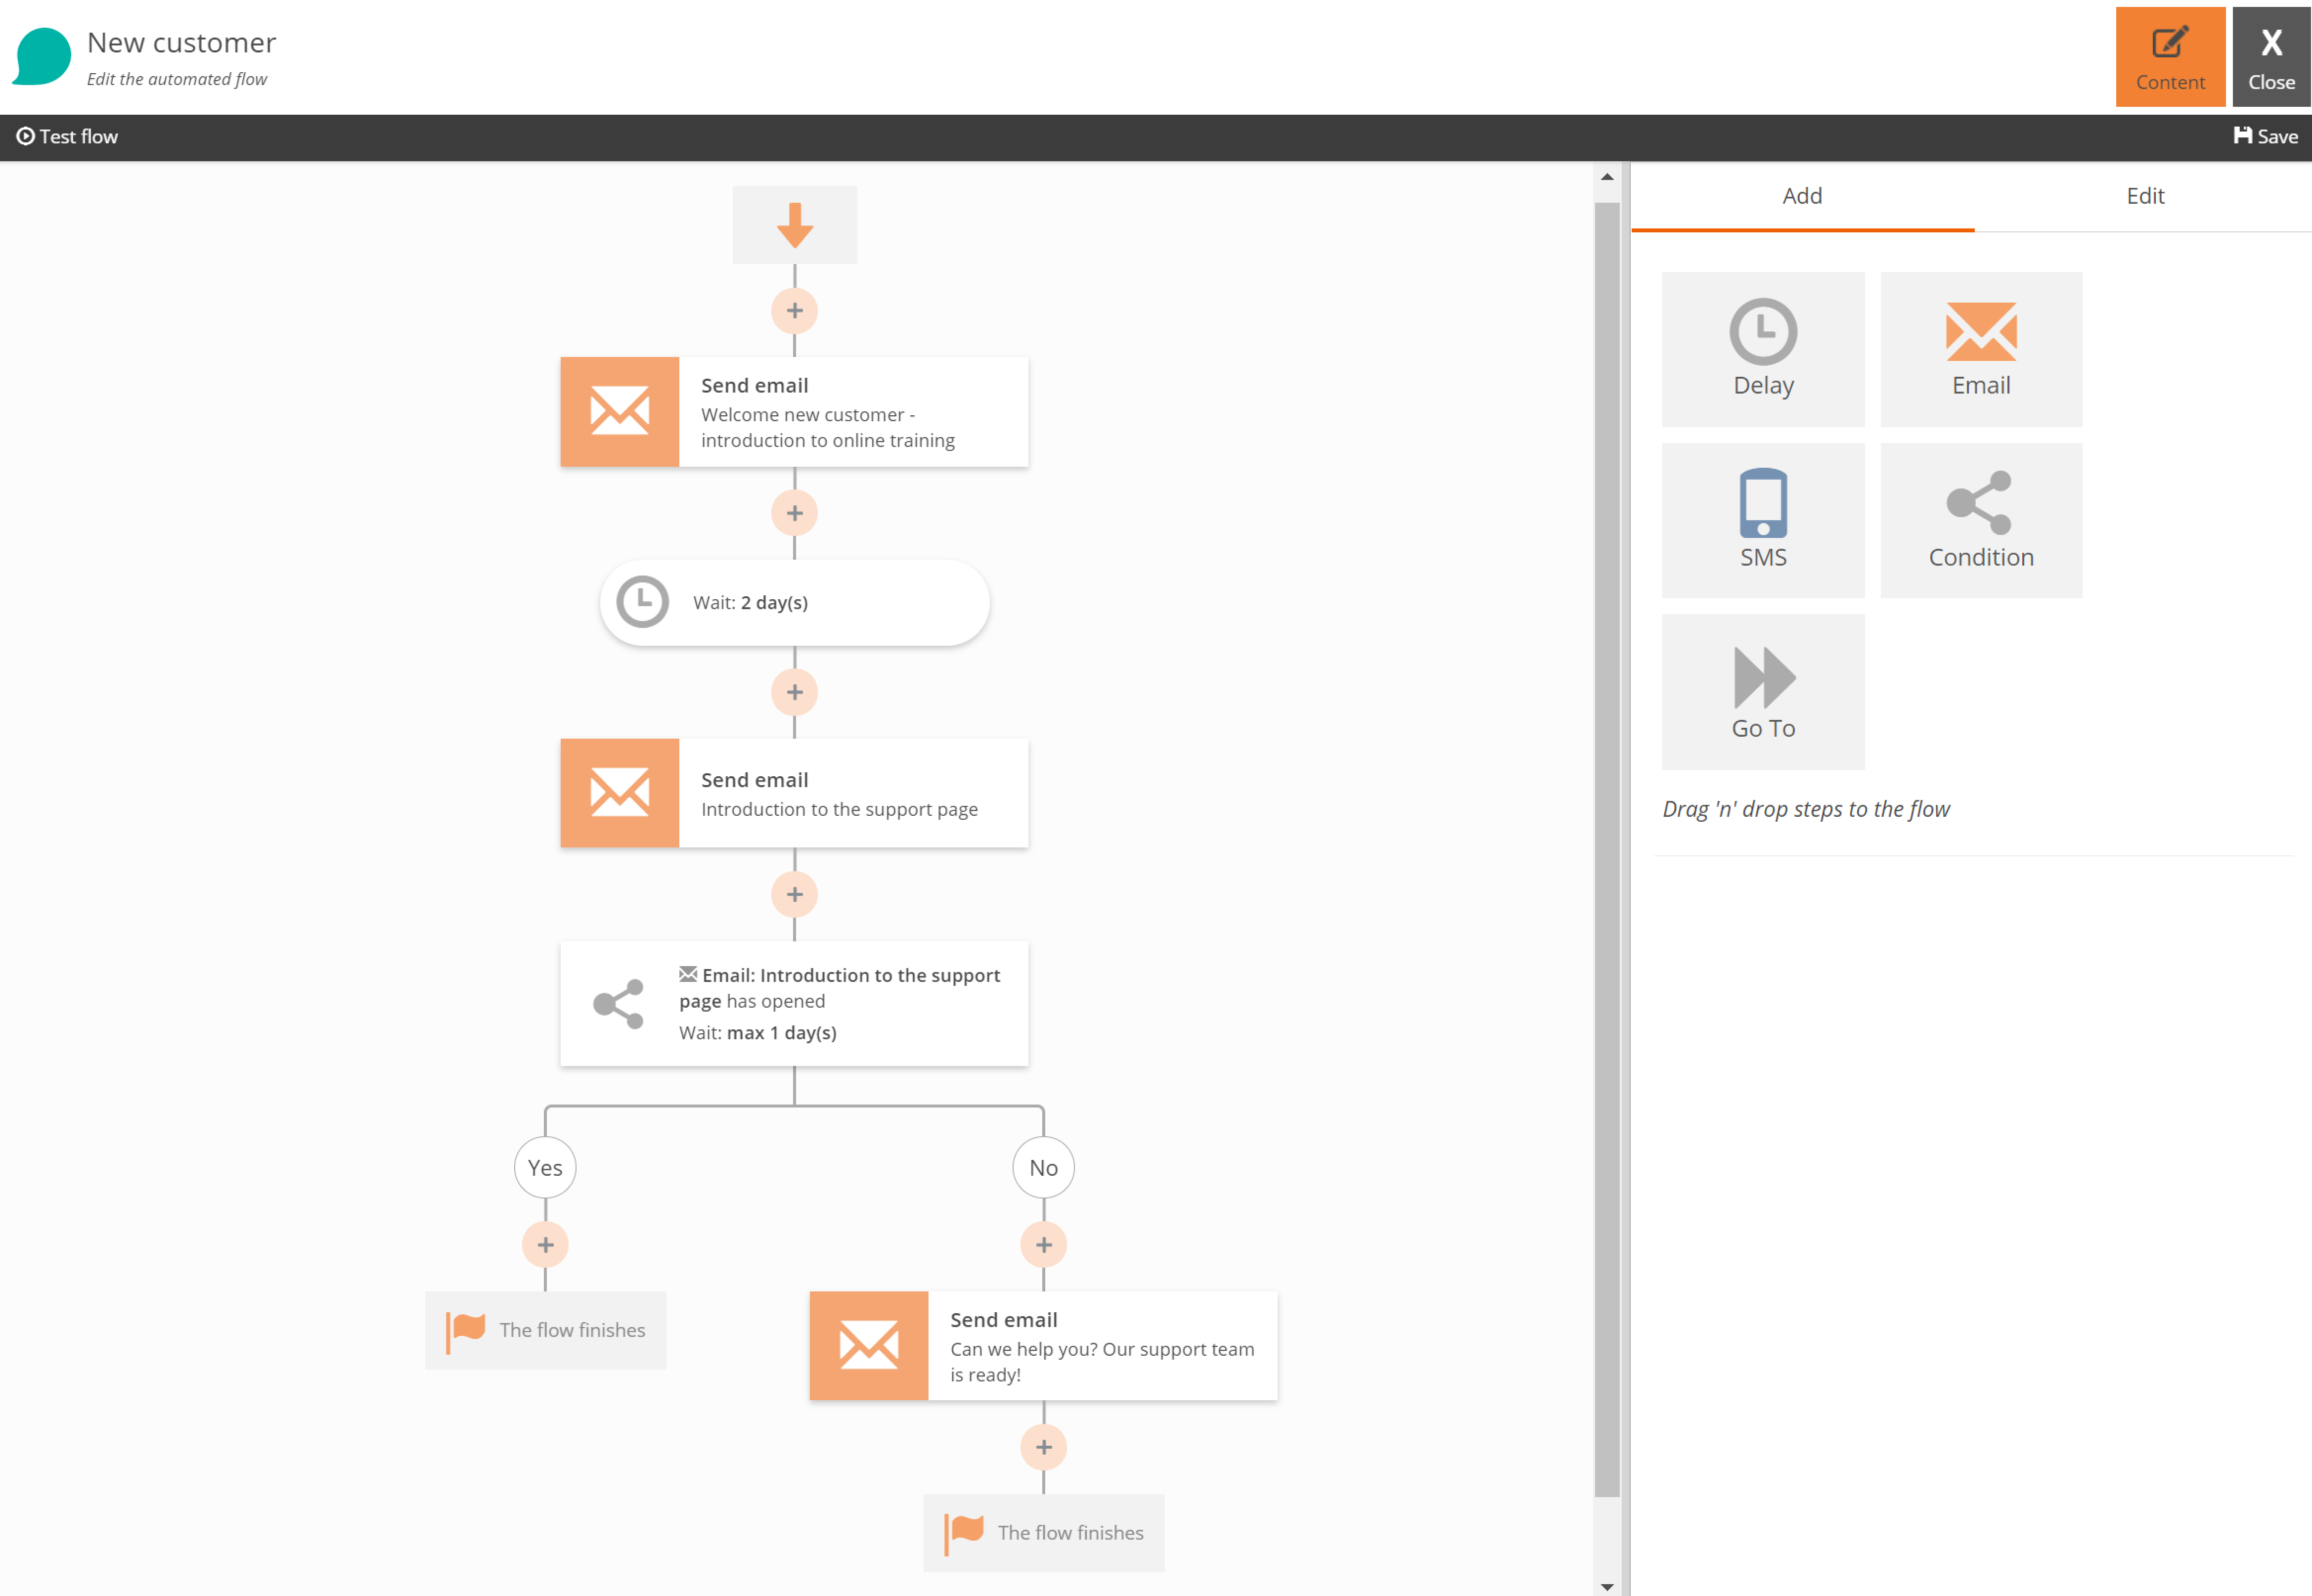
With the condition step it is possible to create logical branches in the flow. Participants will be directed down the yes-path or the no-path based on the evaluation of a specified condition. This is an example of a 'new customer' flow with a condition step:
Conditional step based on the participant data
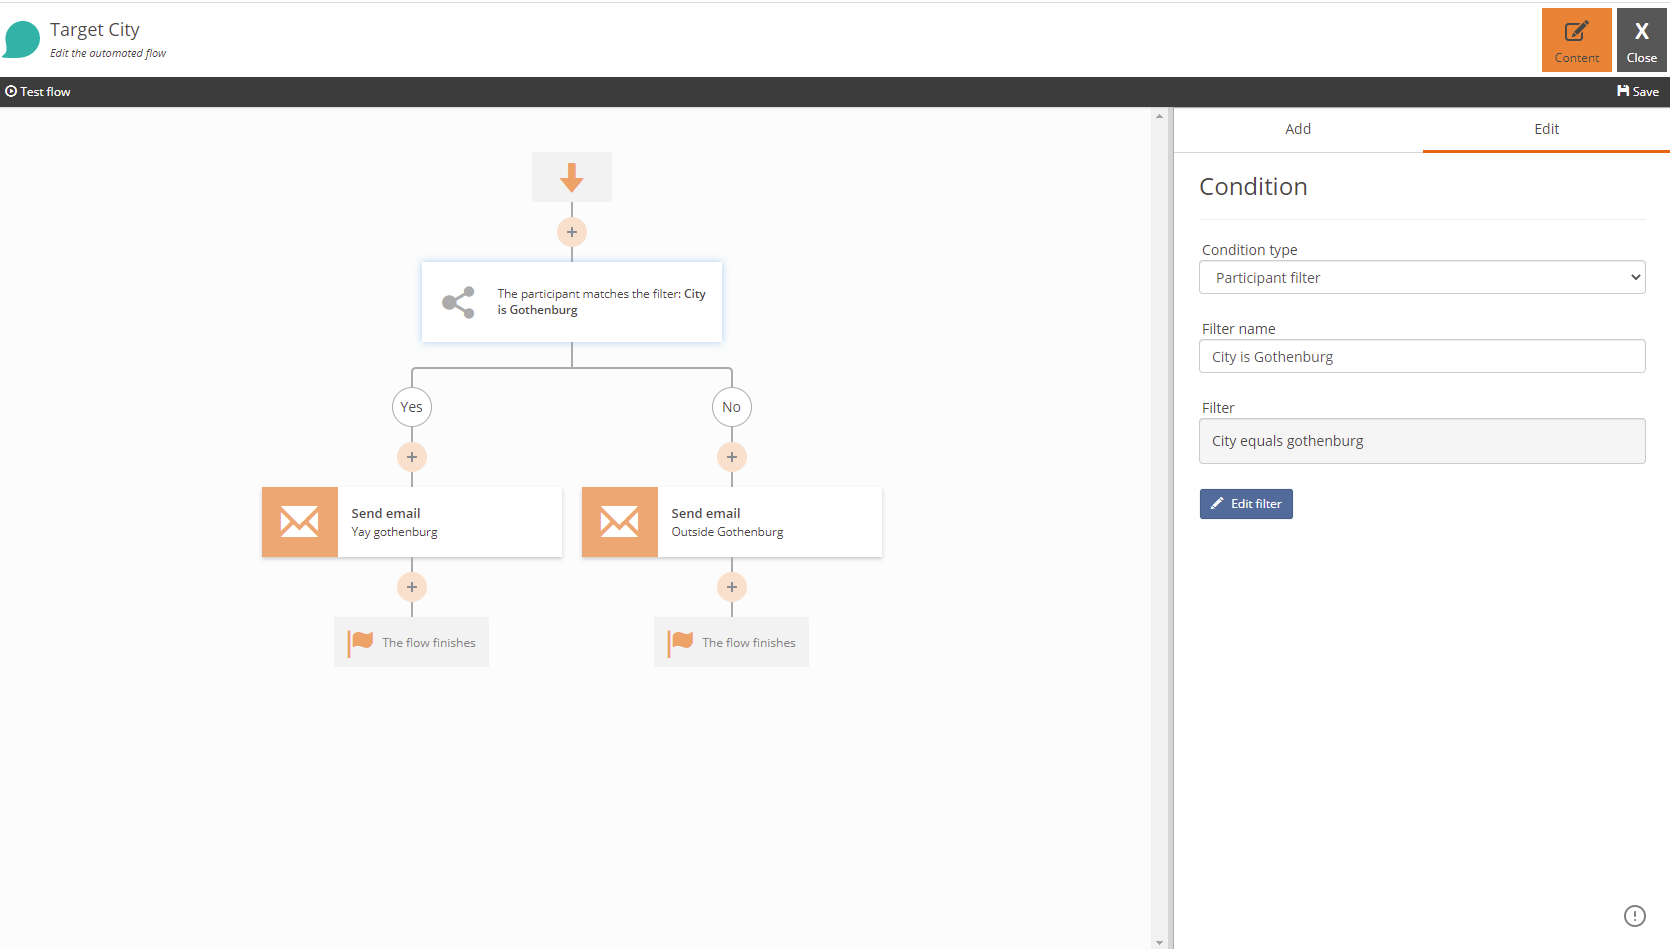
The condition will be based on the participant's data.
Settings
After adding a condition step to the flow you have to select which type of condition step it is and make the settings it in the settings pane.
You need to give the condition step a name for it to be easy to follow in the tree and also for testing. If you have a filter that matches participants living in Gotham City a good name would be i.e. 'Participants in Gotham City'.
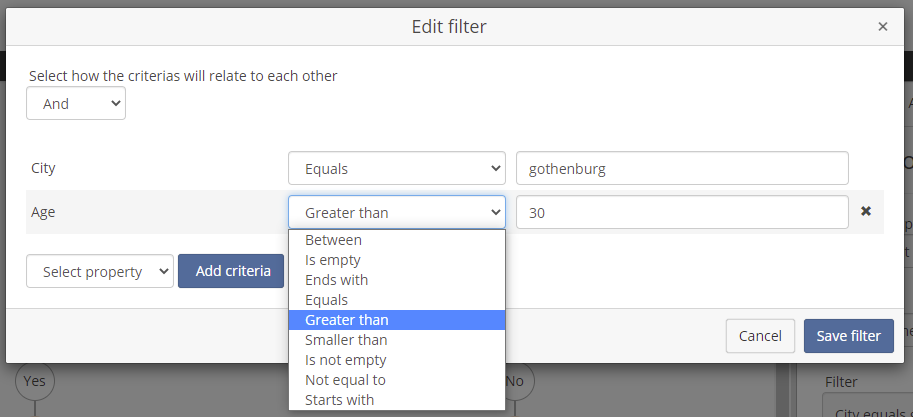
Then you need to create the actual filter with the filter builder. You can use any participant property that you have defined in the automated flow. You can add single or multiple critiera for the filter and also select how they relate with each other (and/or). Each criteria can be evaluated (equals, starts with, contains, smaller etc) in different ways depending on the data type. (strings, numbers and dates). Make sure that your properties are of the correct type if you need to do numeric/date comparison i.e. between or smaller/bigger.
When a participant is evaluated for the the condition filter it will end up in the yes branch if the filter matches - otherwise it will end up in the no branch of the tree.
If you don't edit the filter or leave the filter empty the step will not validate and you can't start the flow.
Condition step based on email activity
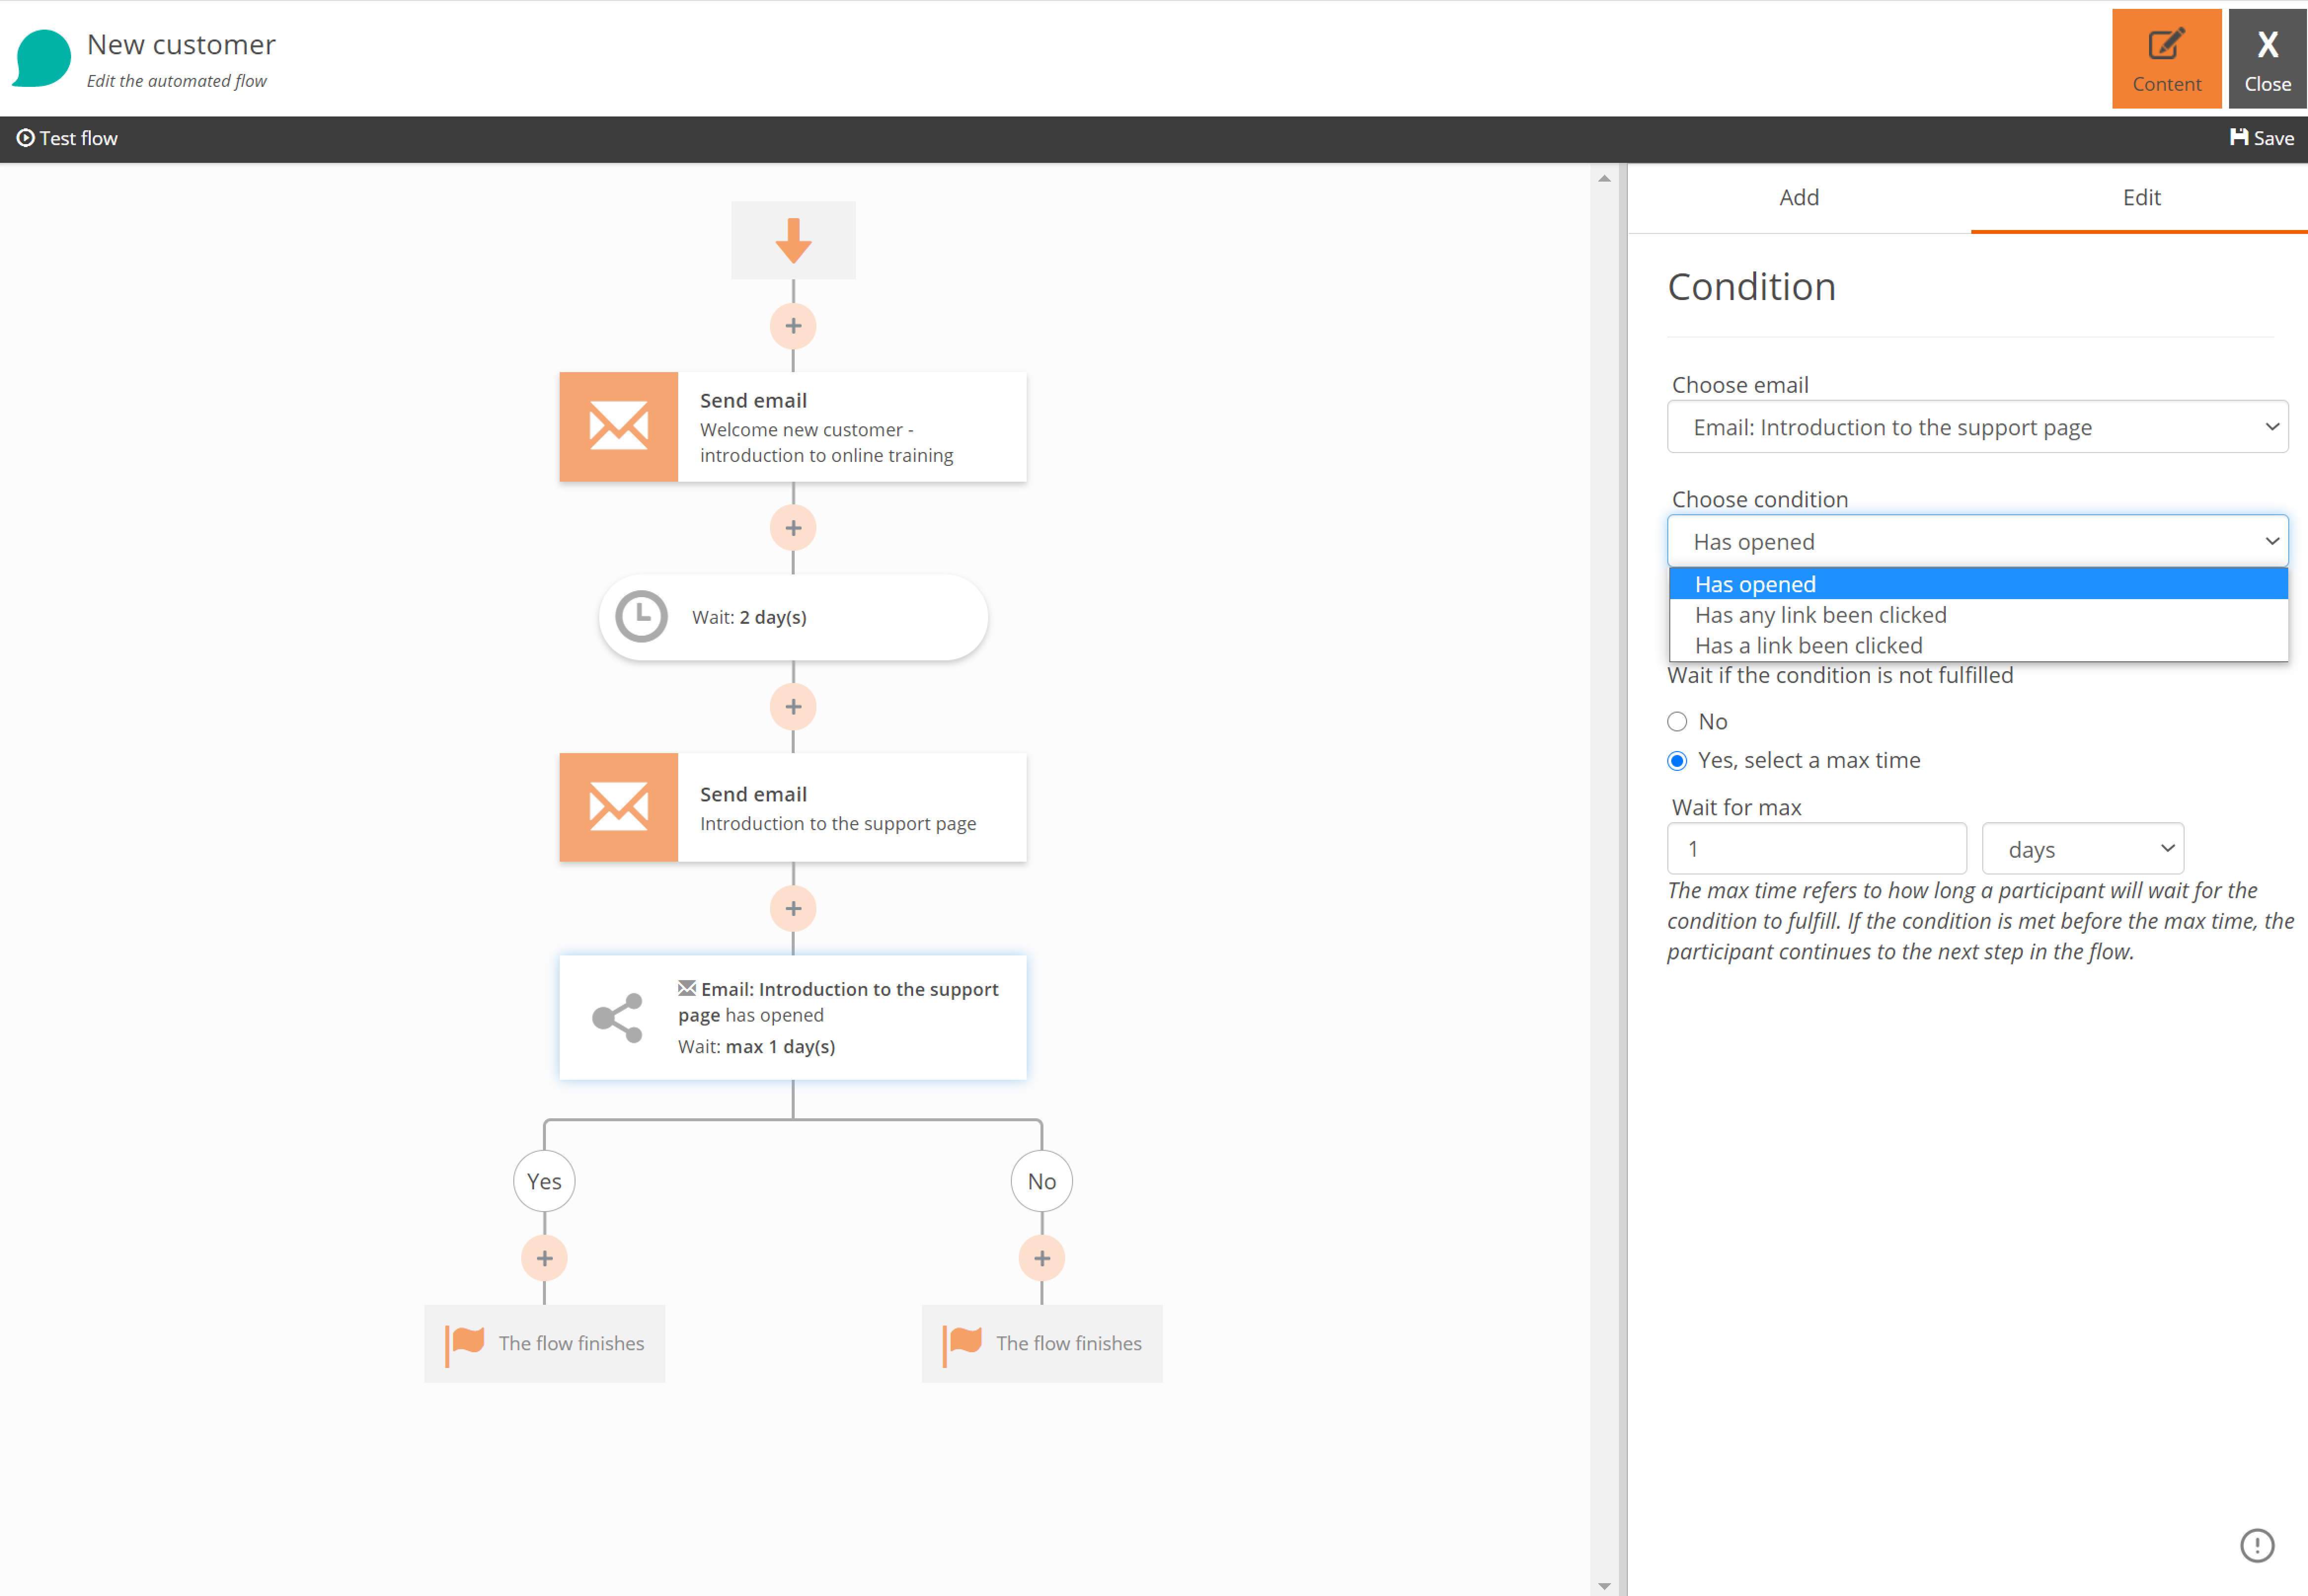
The condition will be based on the participant's activity for an email in the flow.
Settings
After adding a condition step to the flow you have to select which type of condition step it is and make the settings it in the settings pane.
You choose the email that the condition should be based on and you choose the condition. The available conditions are: "has opened", "has any link been clicked" and "has a link been click".
If you choose "has a link been click" you will choose which links, one or more, that should be pin-pointed for the condition.
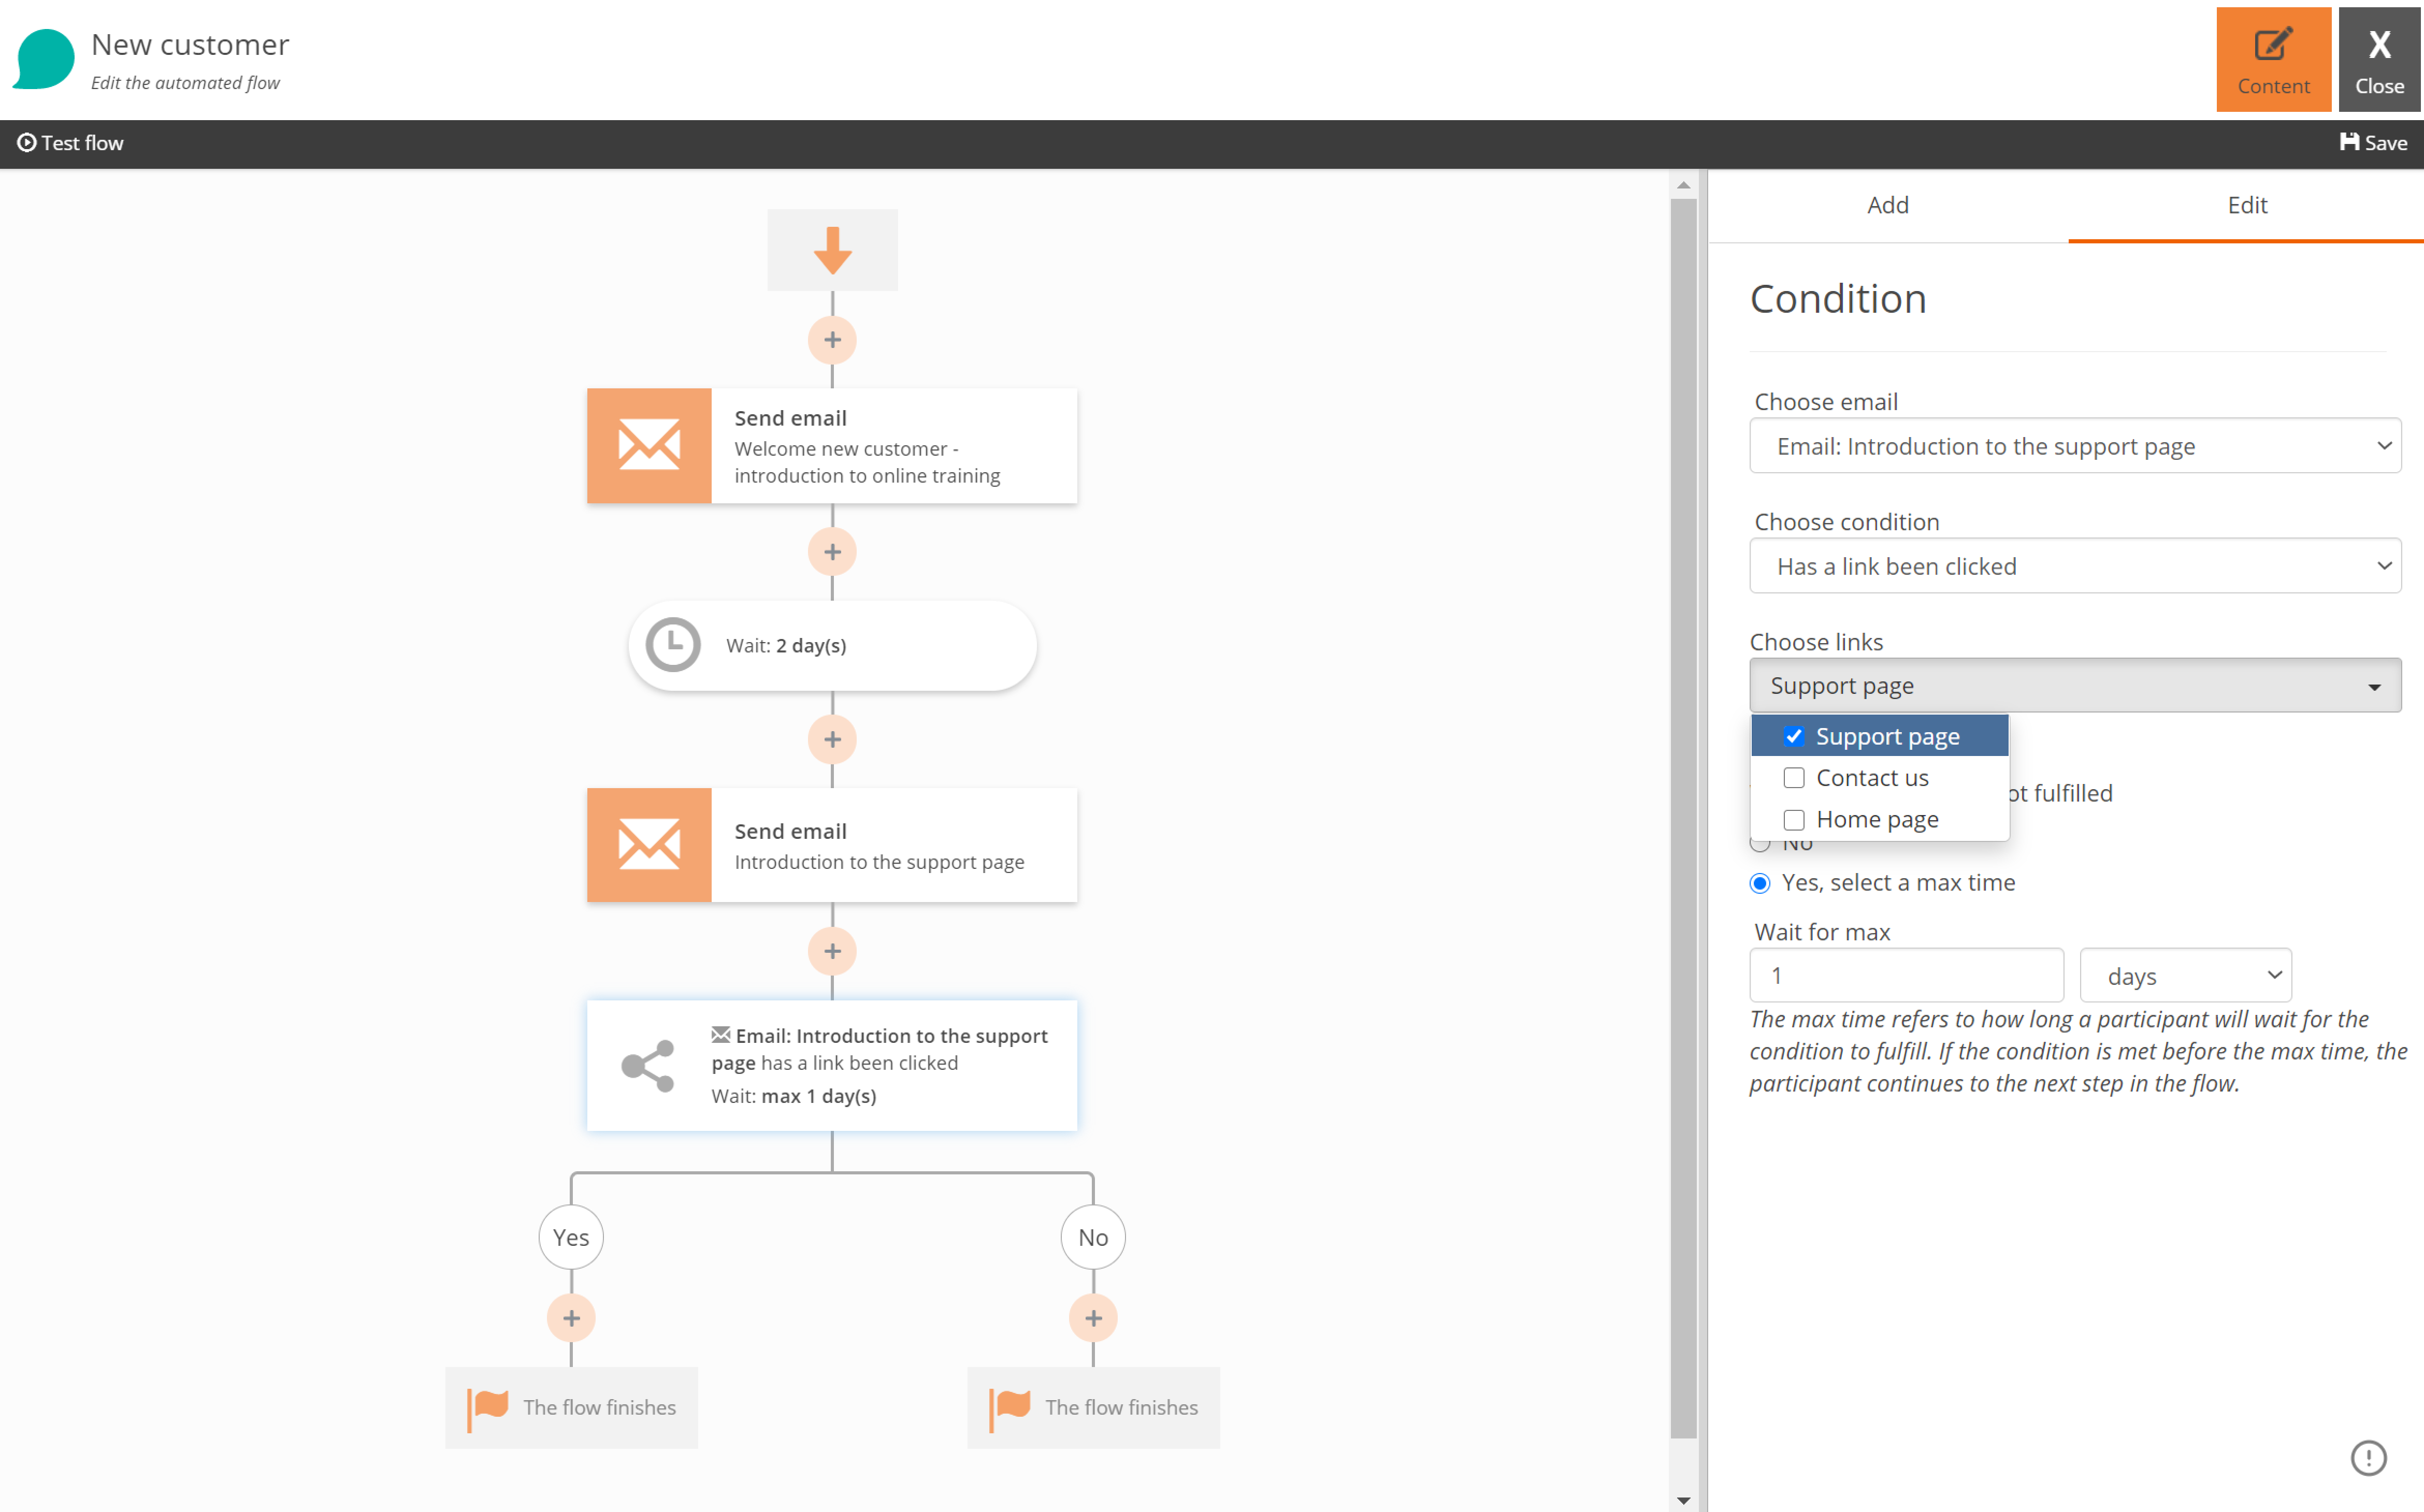
It is also possible to choose a maximum time to wait if the condition is not fulfilled. When the condition is met, even if it is before the maximum time, the participant will move on to the yes-branch. If the condition has not been fulfilled after the specified maximum time, the participant will continue to the no-branch.
When the settings have been made for the condition step, you can continue to build the flow and decide what's going to happen/not going to happen in the yes- and no-branch.
The Go To step
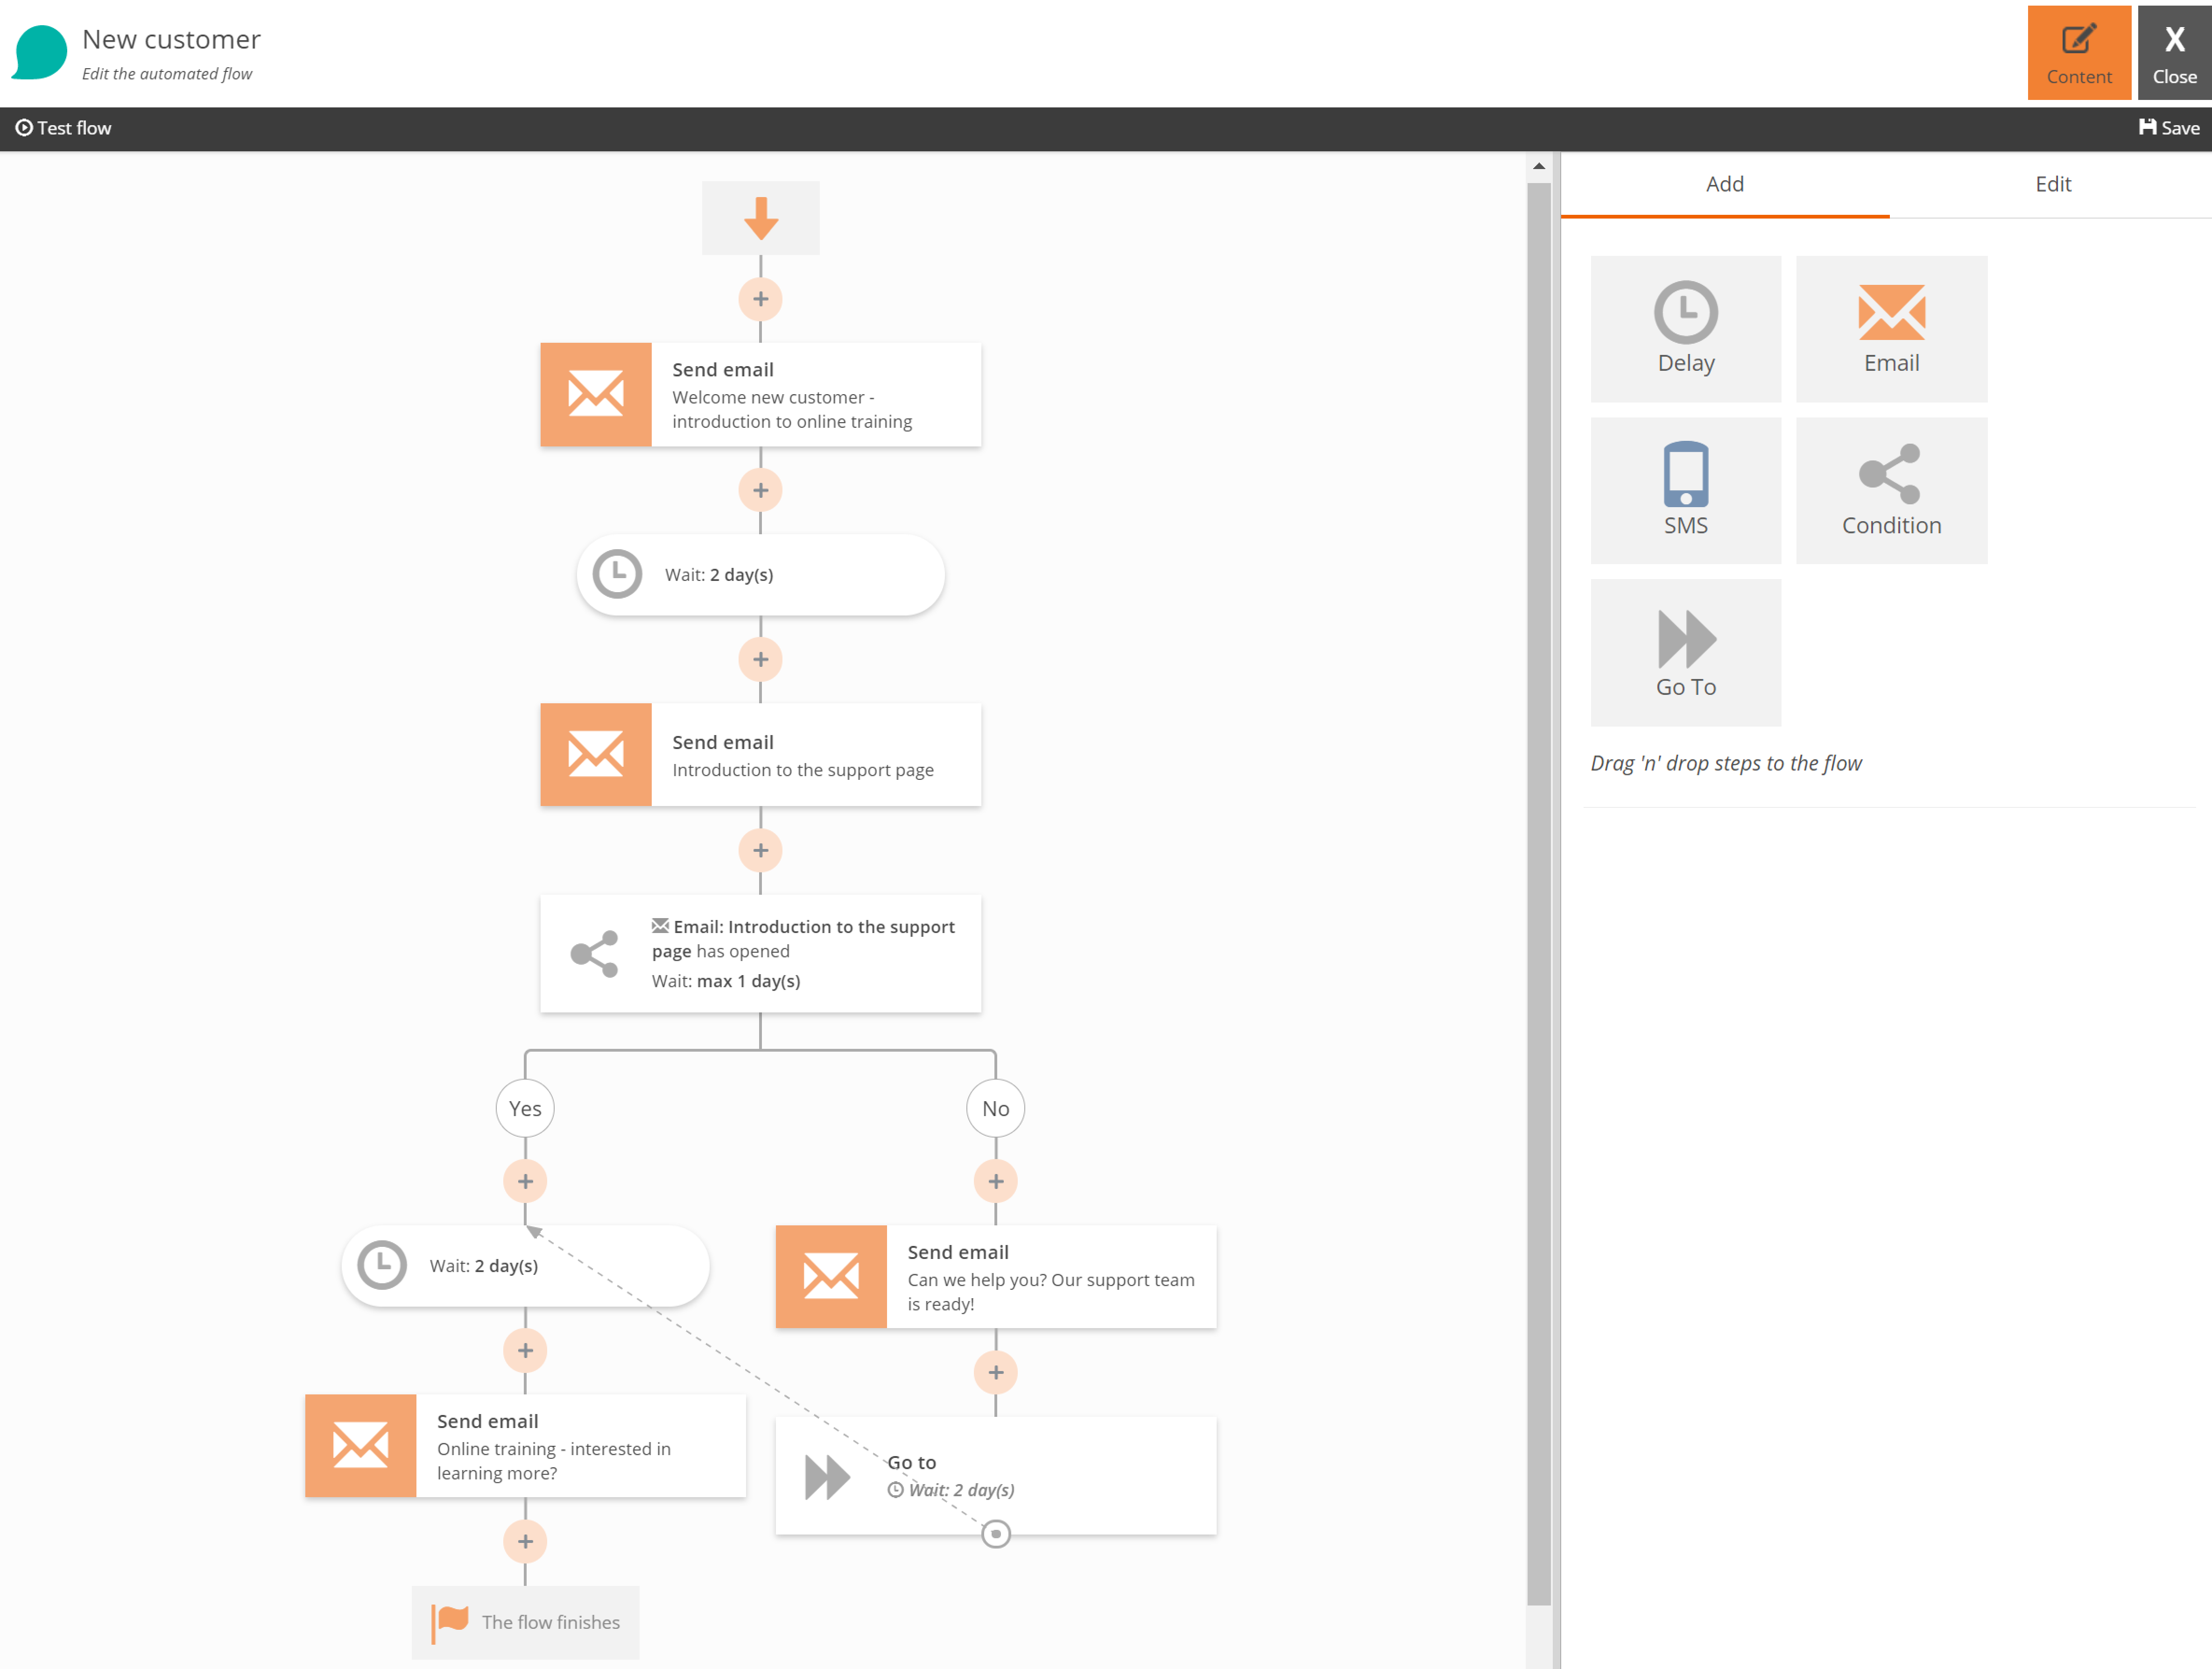
The go to-step allows you to move participants to another step in the flow. By using this step, it's for example possible to let participants in a no-branch move to back to actions that should be executed for everyone. See the picture below.
Note that it's not possible use the to go to-step to create a loop. So it's only possible to choose steps that will not create a loop.
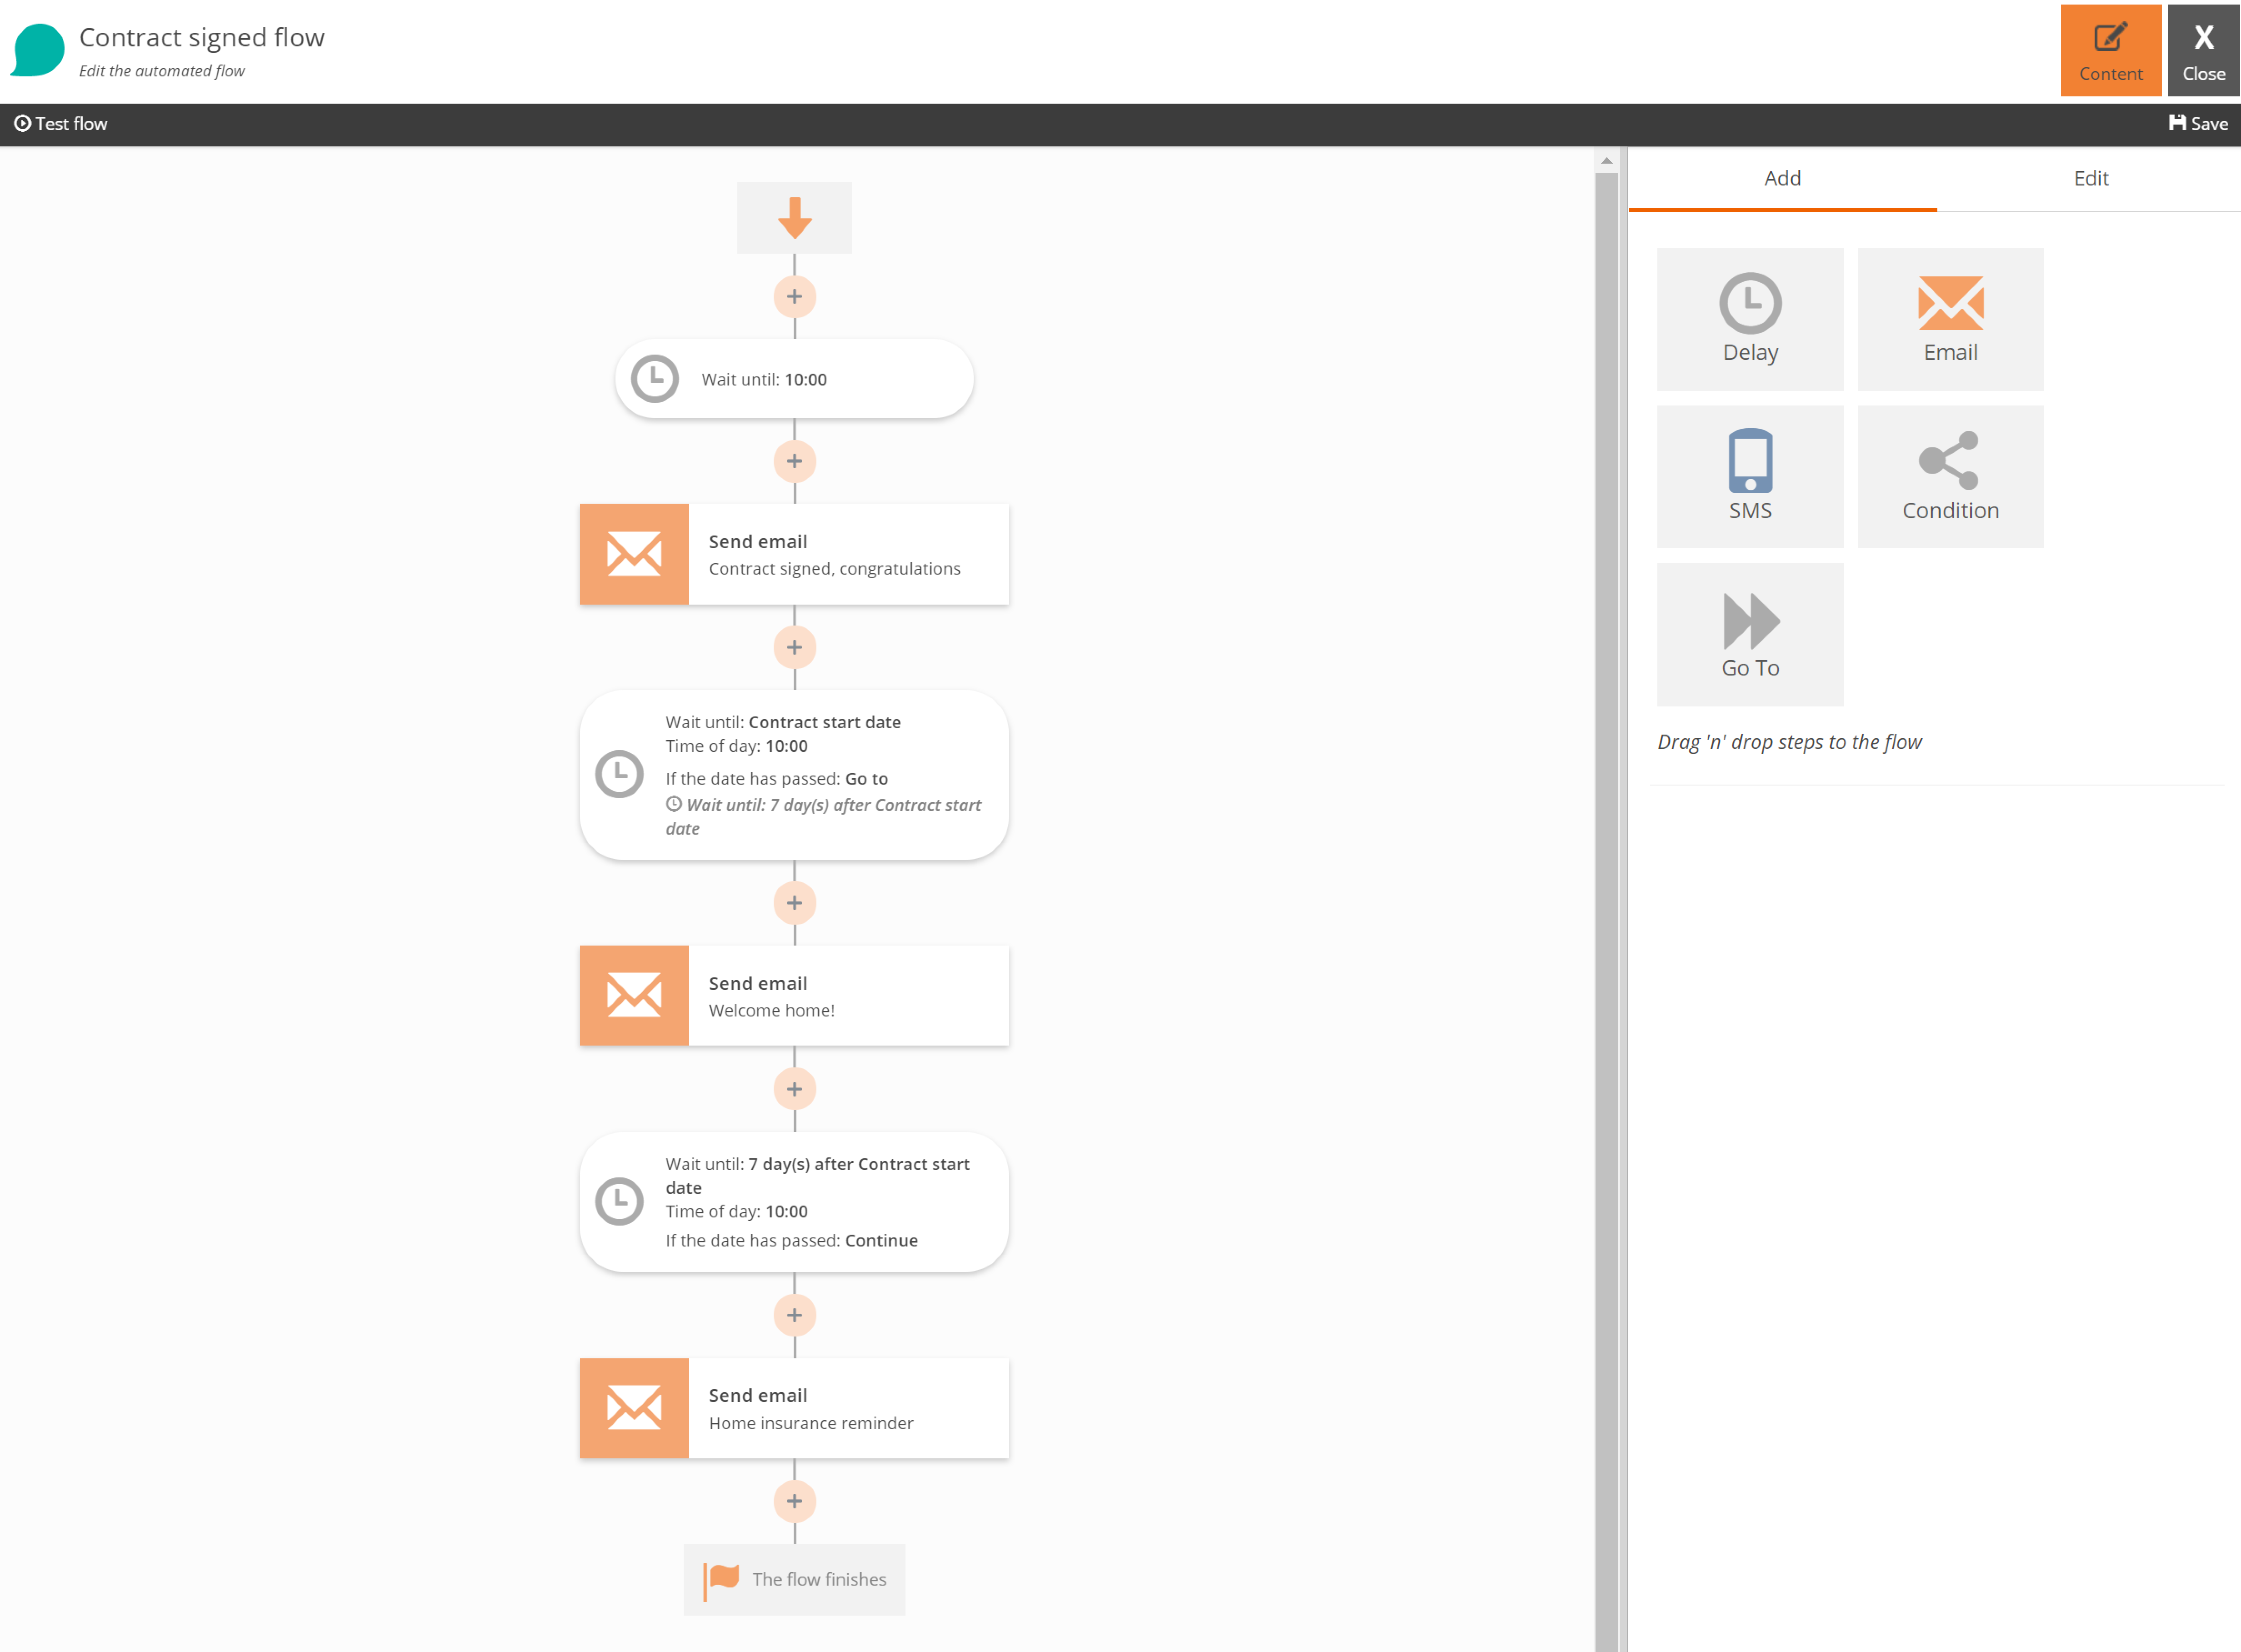
The Target Date step
The purpose of the target date step is to create a timeline flow with actions that relates to a target date provided by the participant.
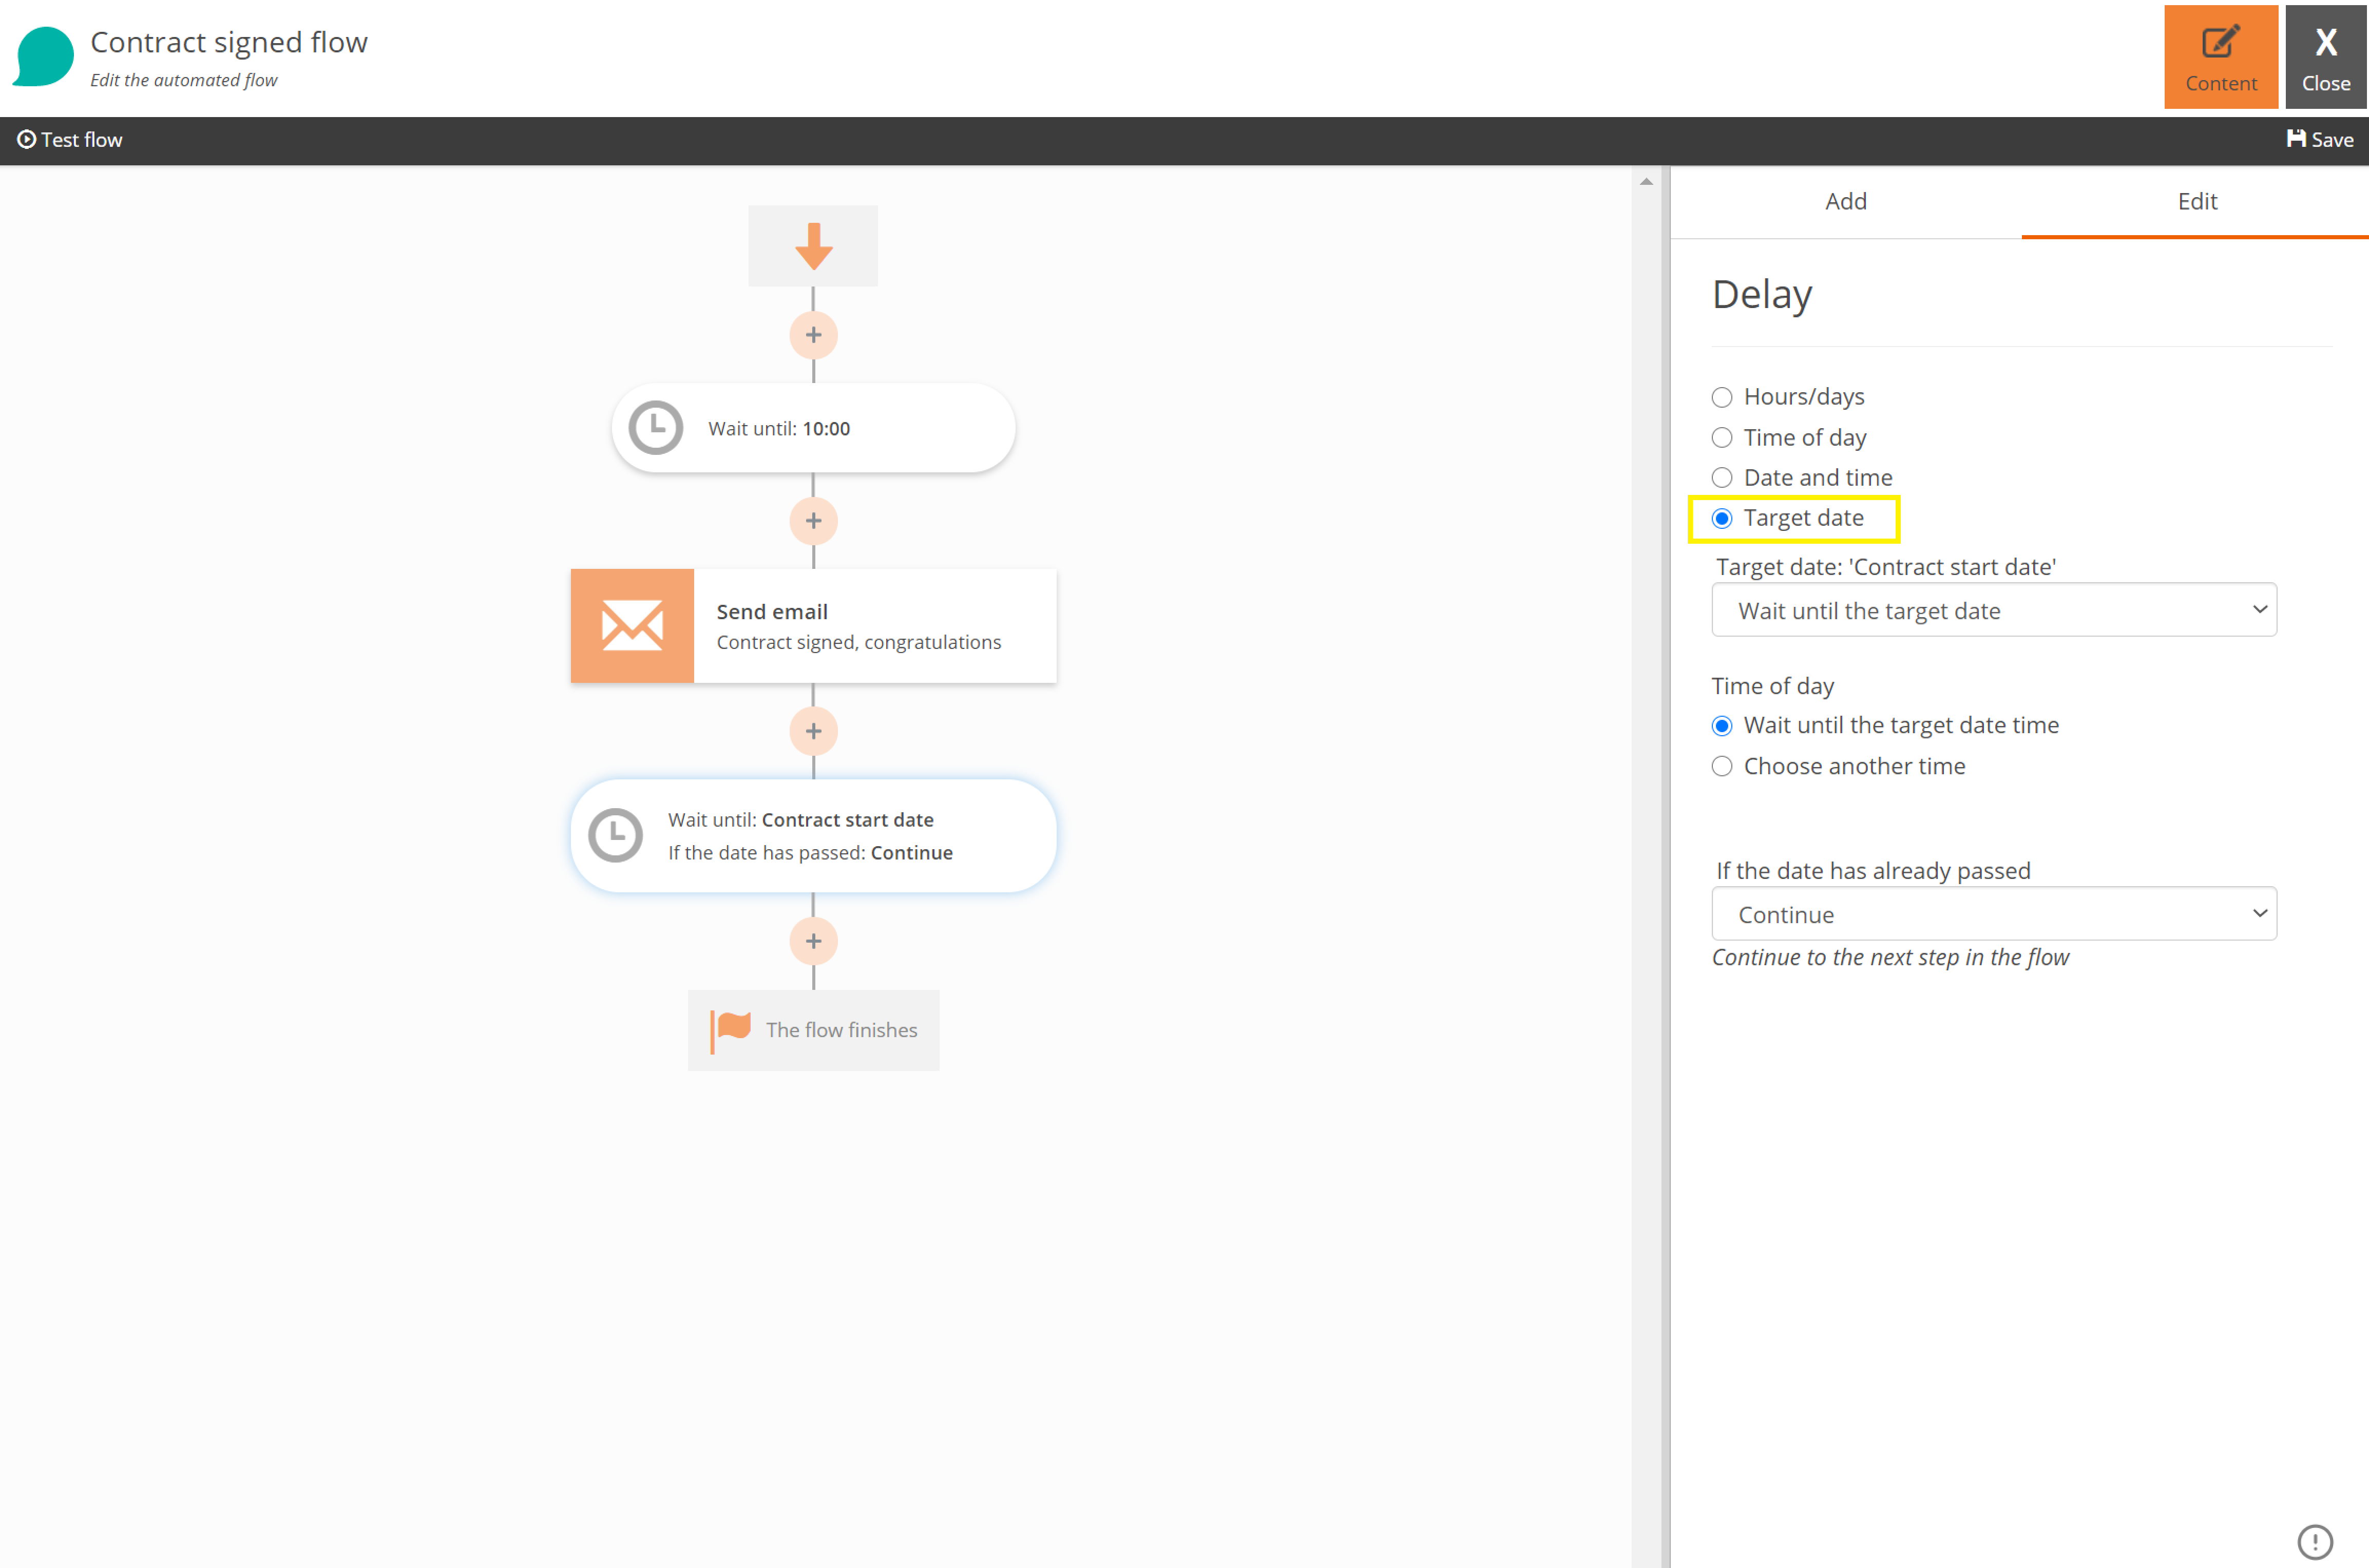
The target date step is a type of delay, hence it is a part of the delay step. To create a target date step you add a delay step to the flow and choose 'Target date' in the settings pane.
It is only possible to create a target date step if a required participant property with the type 'Target date' exist on the flow.
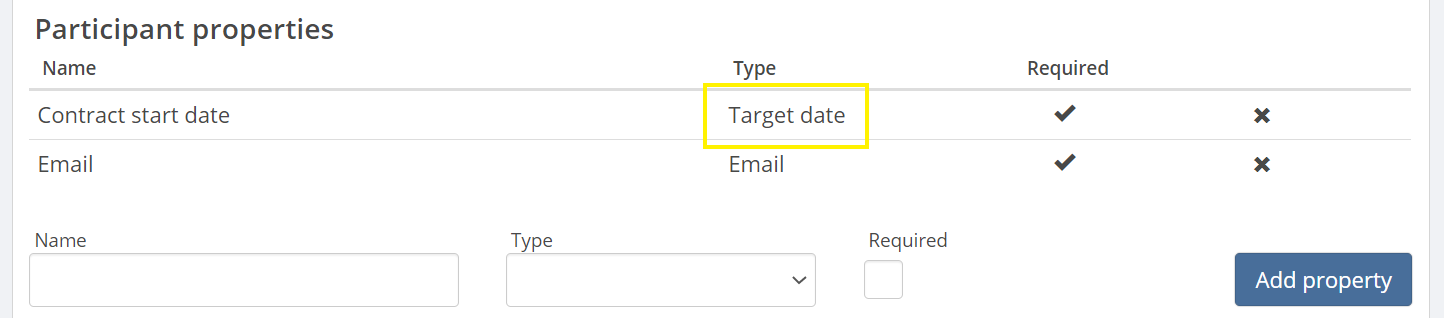
Now, when a participant is added to the flow, a value for the target date will be provided. It can be for example the participant's birth date, a sports event date, or as in this example; a contract start date.
This is an example of a 'contract signed' target date flow:
Settings
It's possible to wait until the target date or until a time before or after the target date.
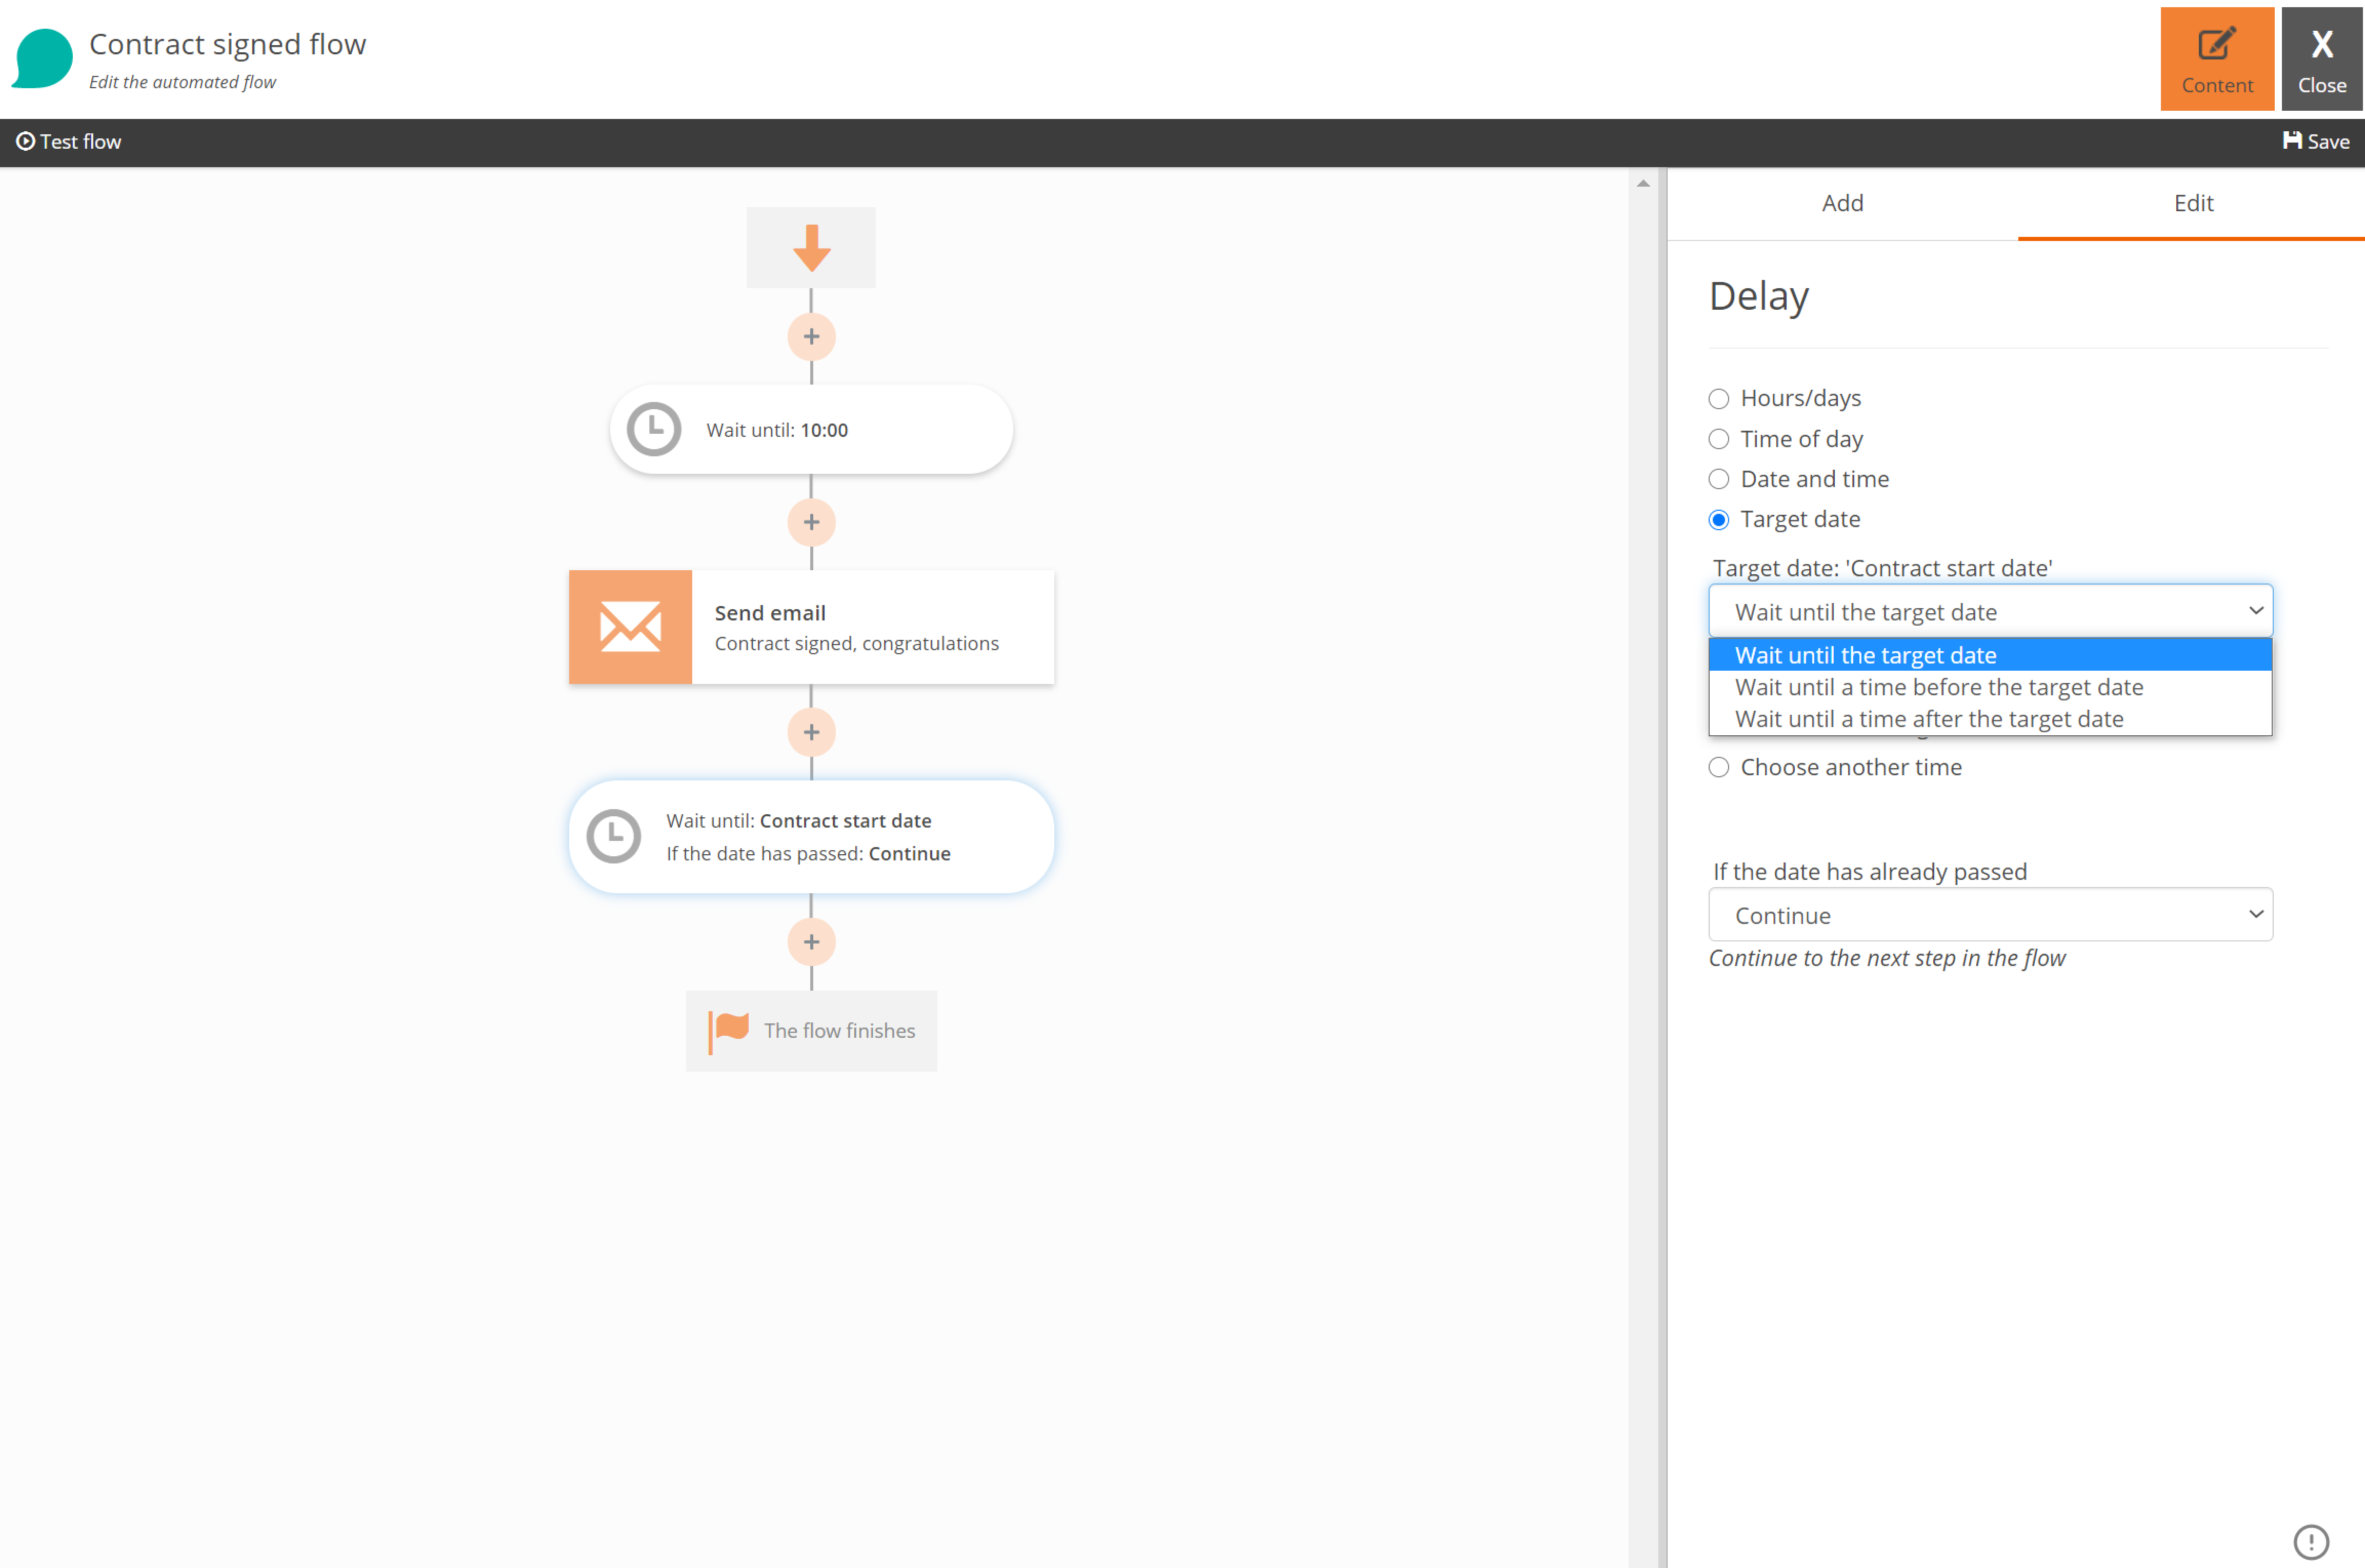
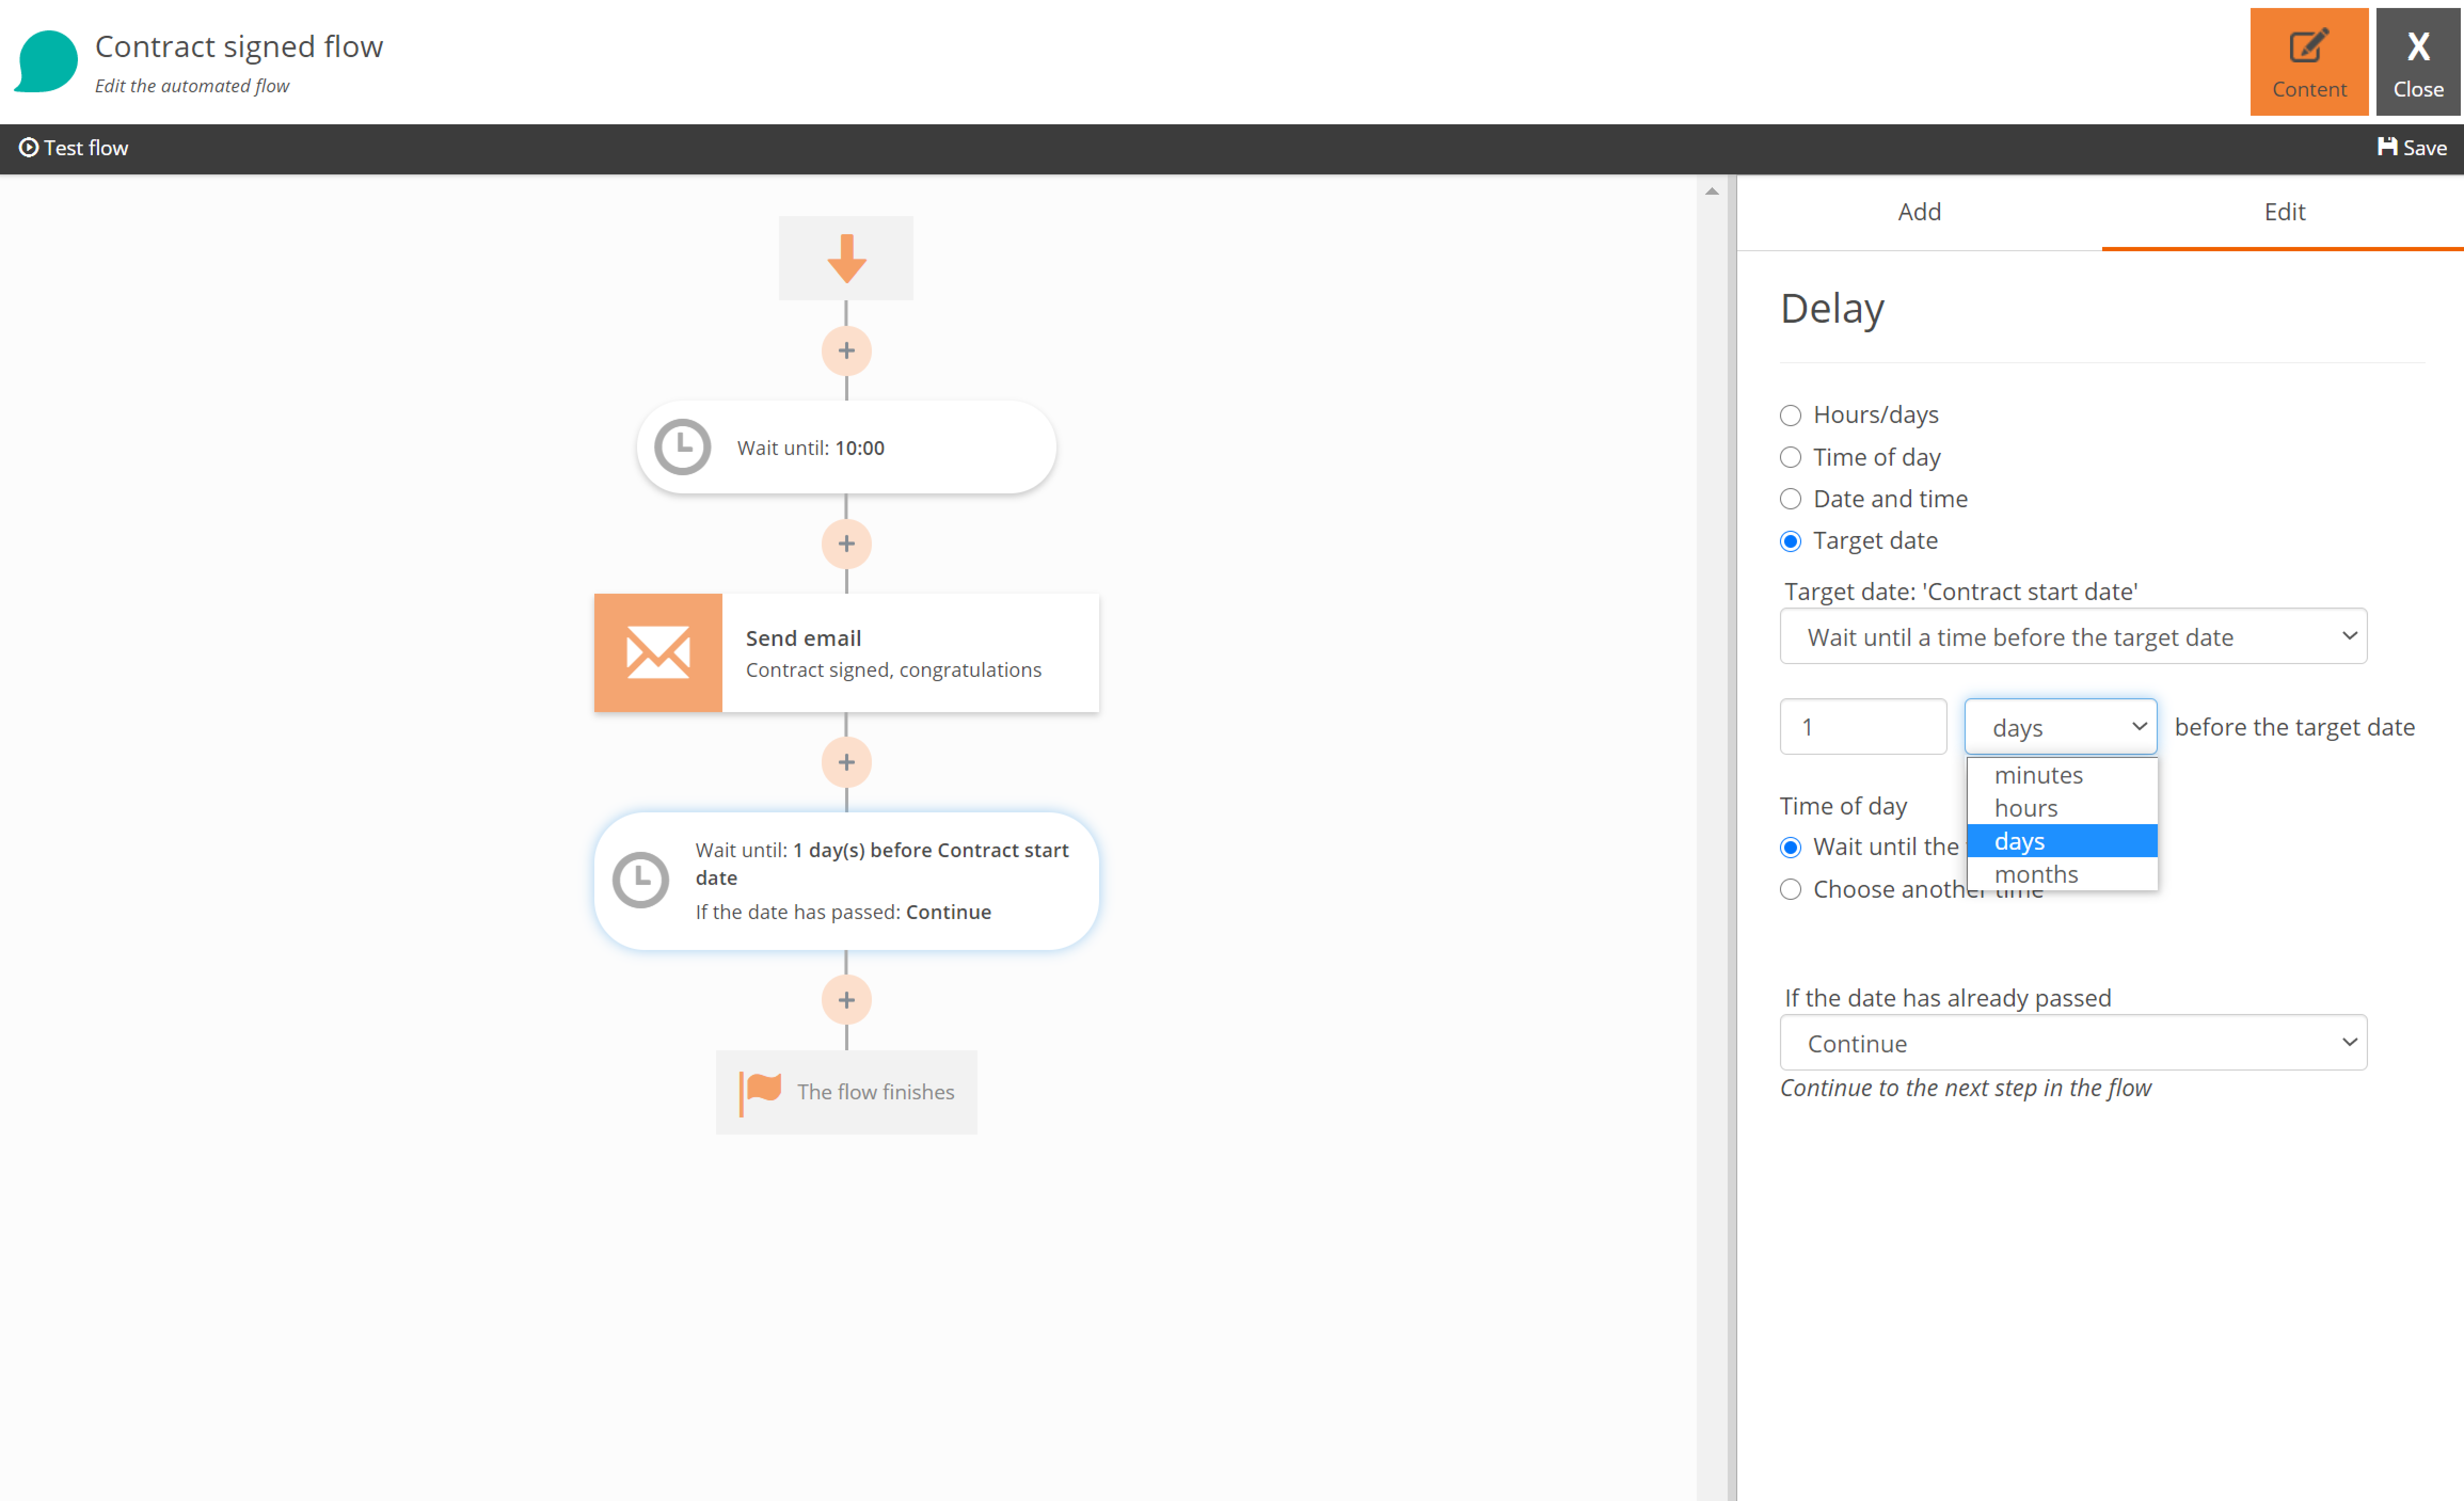
If you choose a time before or after the target date, you will be able to specify that amount of time in minutes, hours, days or months.
Furthermore you can choose to wait until the target date time of day, or you can set a custom time of day.
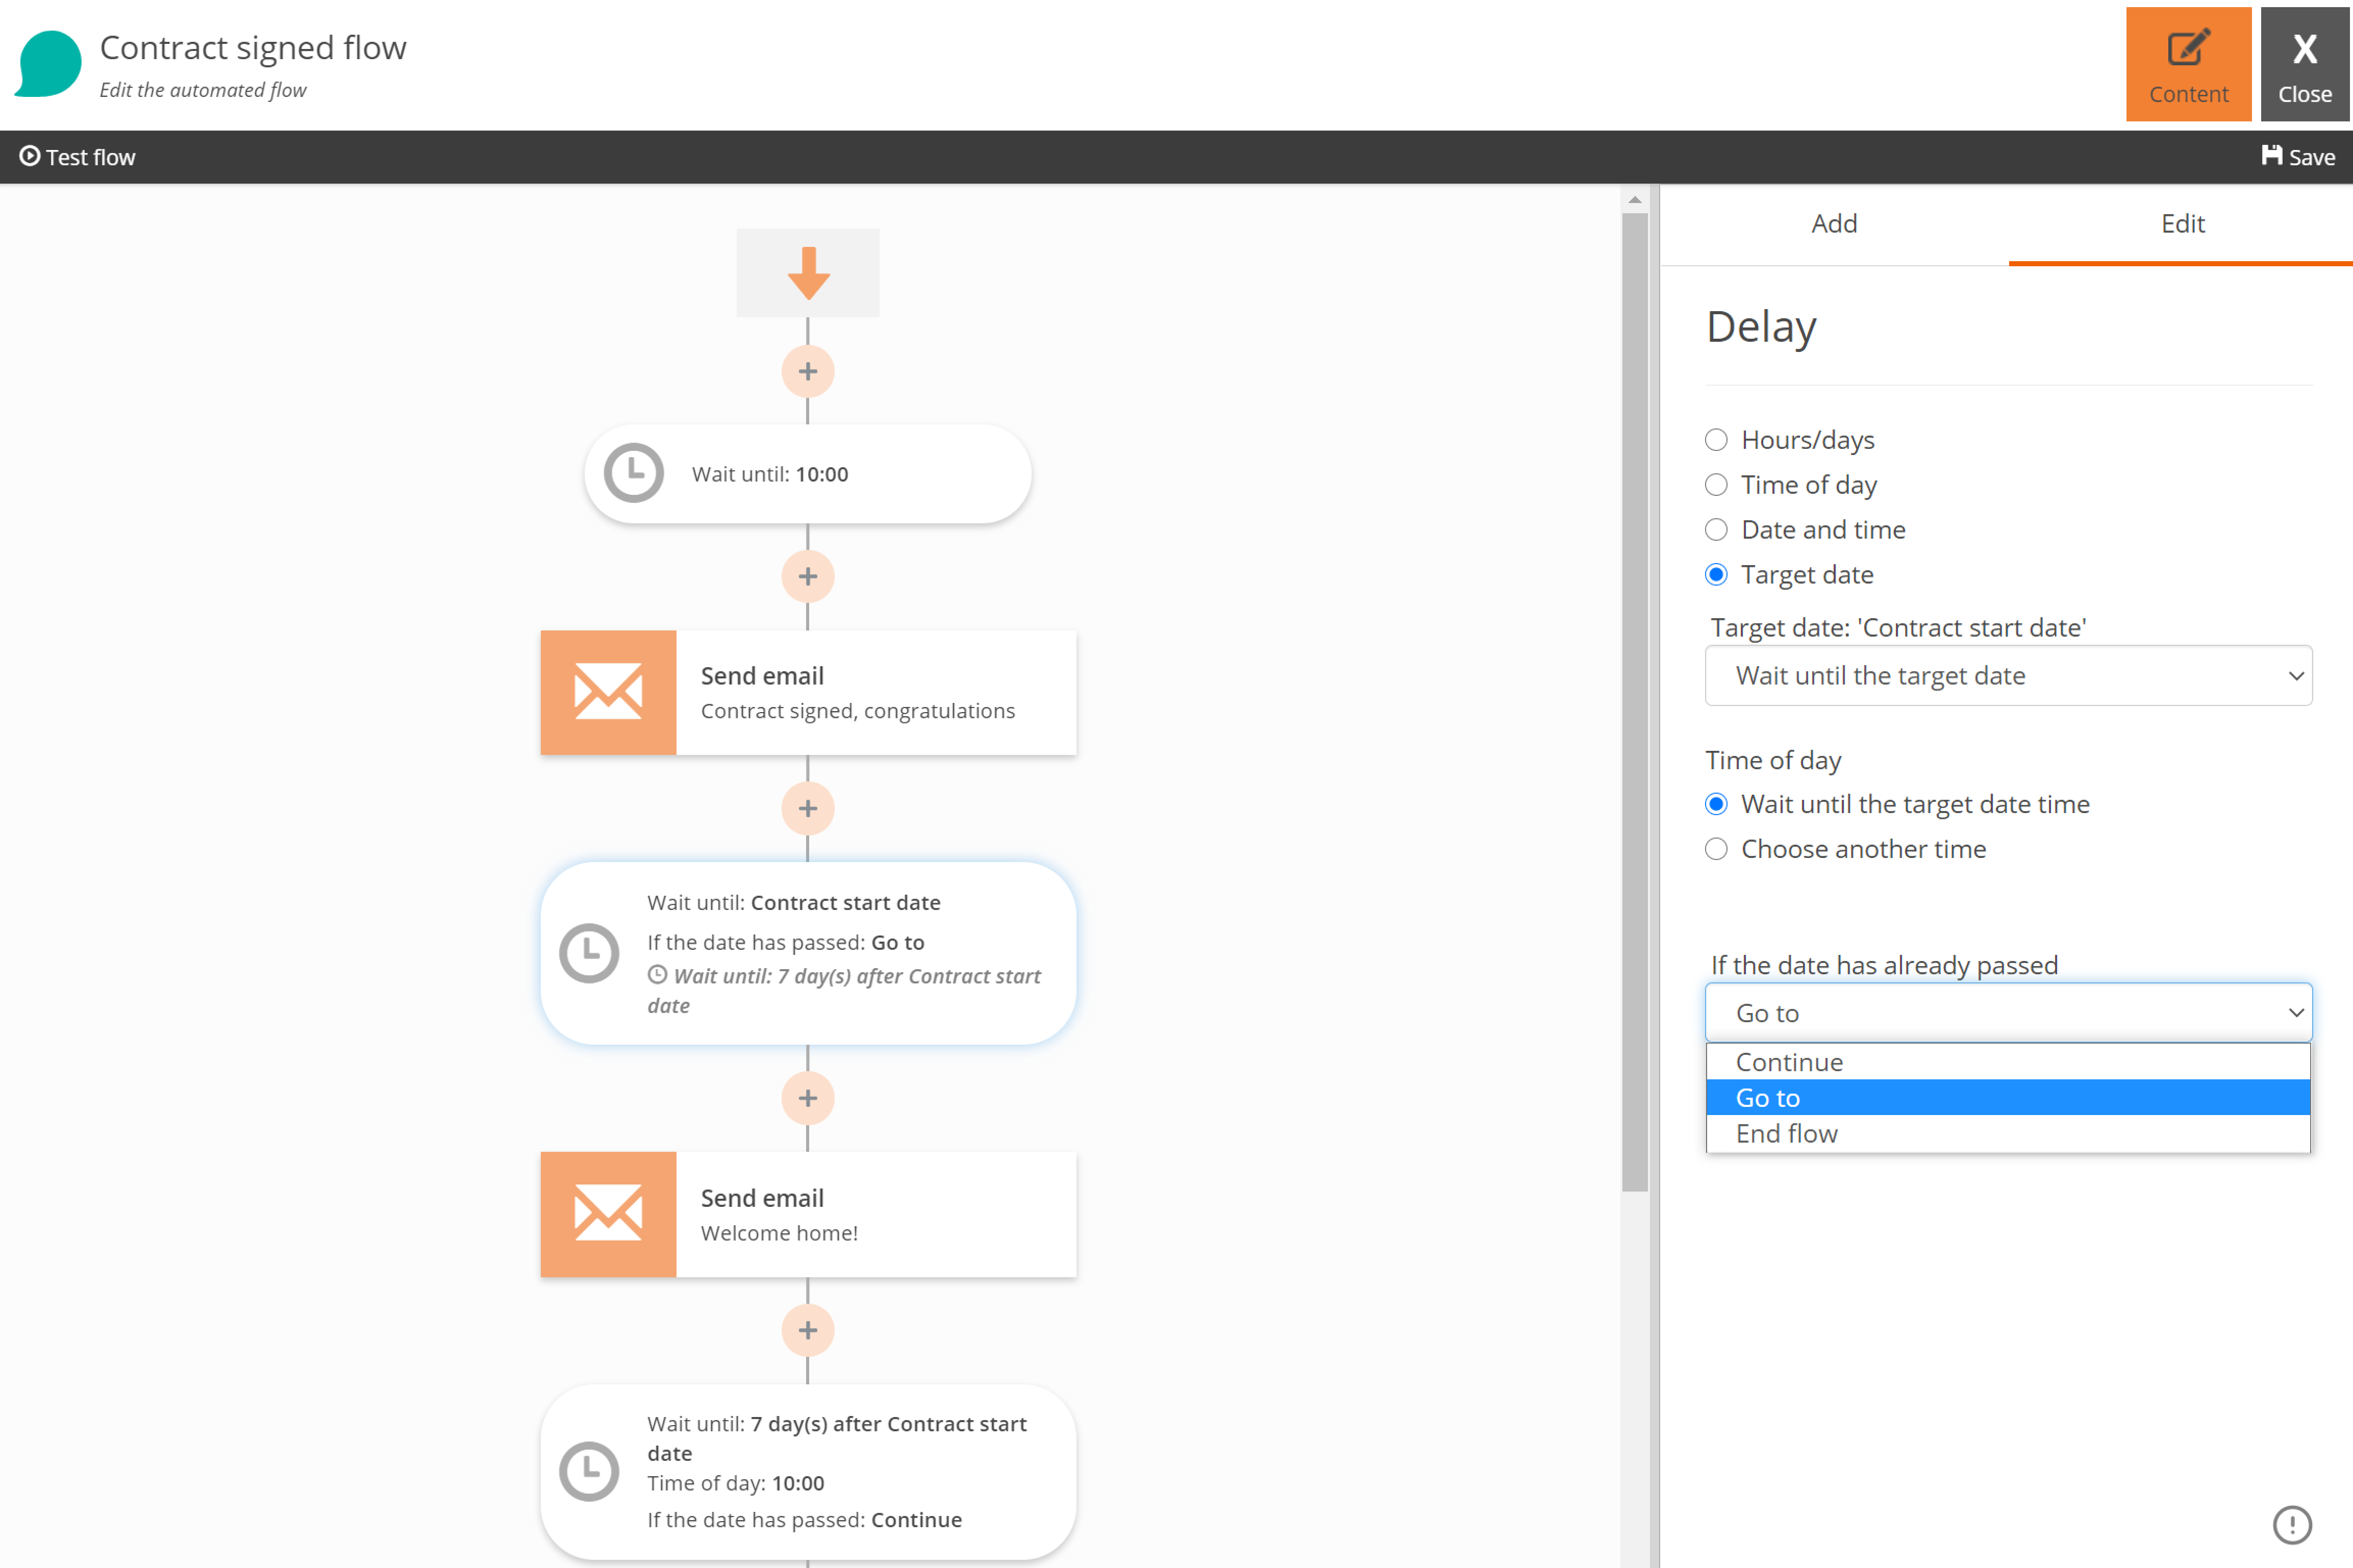
It's possible that the date has already passed when a participant enters a target date step. For that case the following actions exist: Continue, Go to and End flow.
The Continue action doesn't do anything, it just lets the participant continue to the next step in the flow.
The Go to action moves the participant to the next step of type 'Delay - Target date', 'Condition' or 'Go to'. Hence this action can be used to let the participant skip certain actions that does not make a point if not executed in time.
The End flow action ends the flow for the participant, no more steps will be executed for the participant.
The Refresh Participant step
When running an Automated Flow in Lime CRM, the participant is sent to Lime Marketing and added to the automated flow. The participant data remains the same for the participant throughout the flow.
This step makes it possible to update the participant data with the latest data from Lime CRM.
The Refresh Participant step makes a request to Lime CRM to fetch the current participant data and then updates the participant in Lime Marketing.
Note that this step only works for participants created via Lime CRM. The step will fail for other participants.
Settings
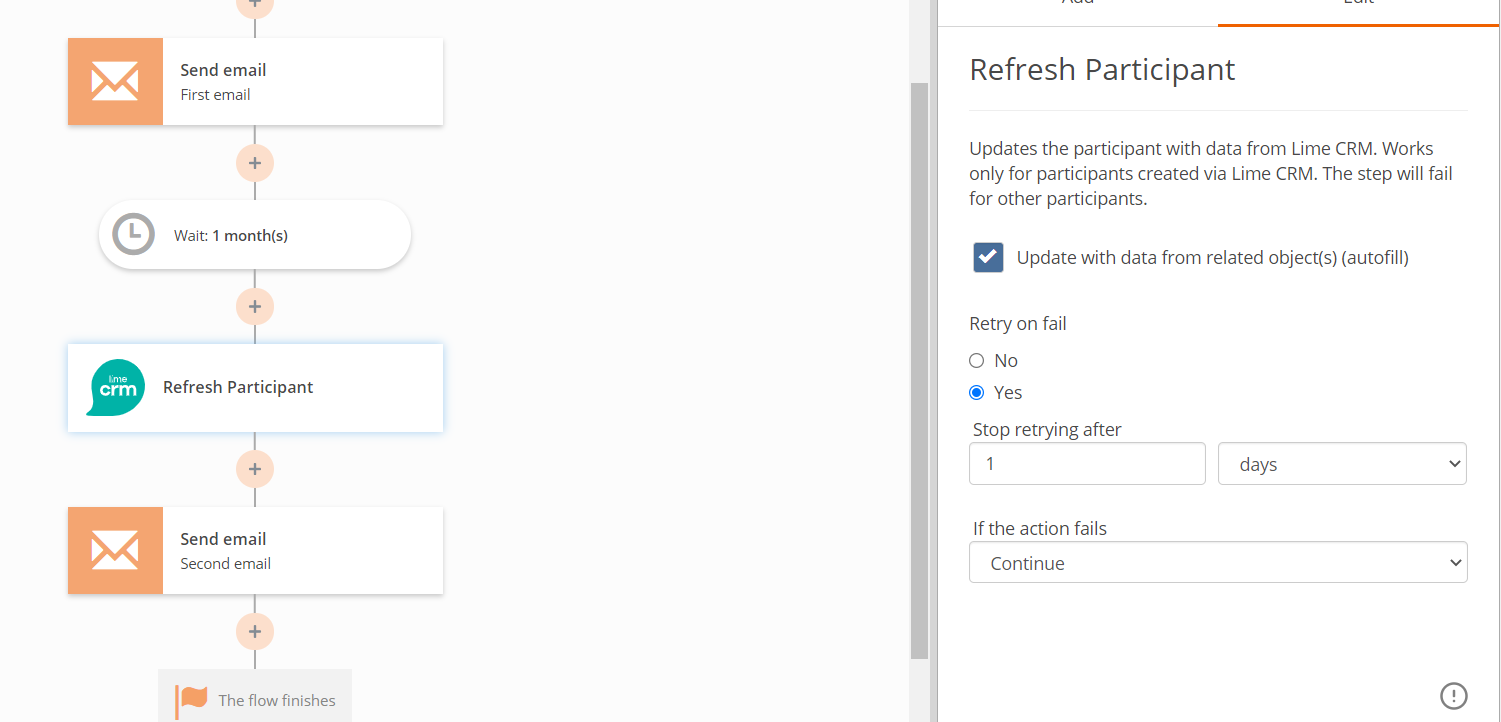
If this setting is checked and the autofill-functionality is configured, the participant data will be fetched from the related object/objects connected to the flow participant card.
(Details on how to configure for autofill can be found here)
If this setting is unchecked, then the participant data will be fetched directly from the fields on the flow participant card in Lime CRM.
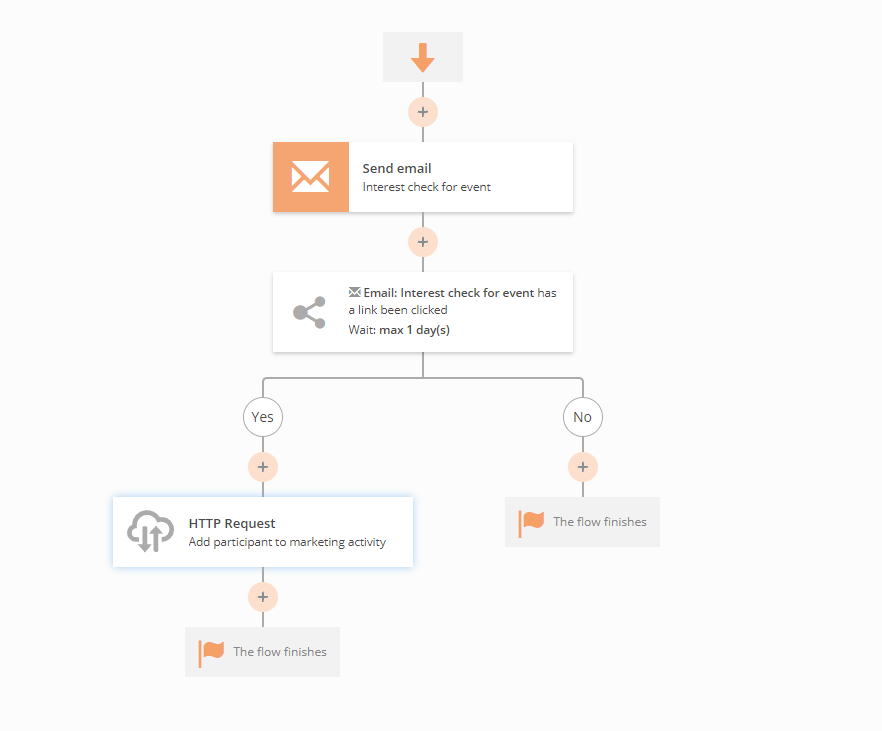
The HTTP Request step
The HTTP Request step in lets you configure a HTTP request to an external system (such as an API request). The supported methods are: GET, POST, PUT, PATCH and DELETE.
For example you can add an automated flow participant as a participant to a Marketing Activity in Lime CRM.
Settings
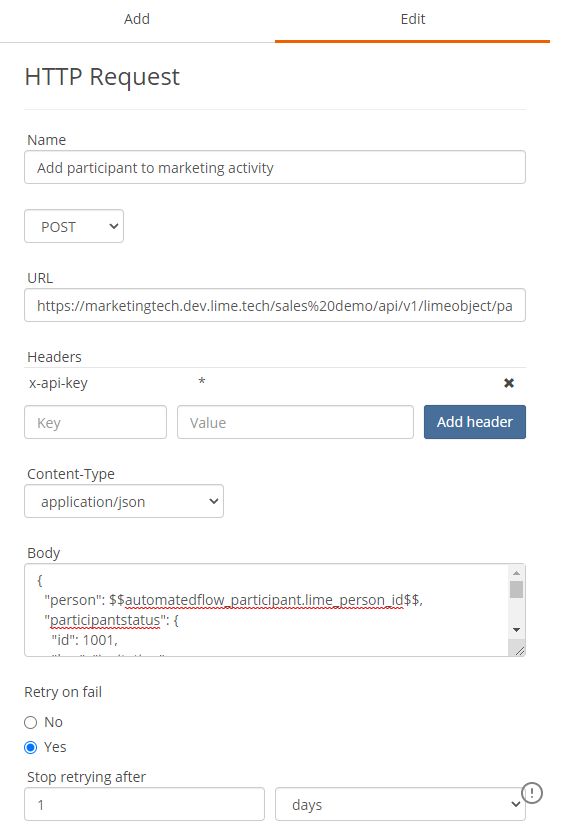
Name: A display name for your request. This name will be shown in Lime CRM.
Method: Select what HTTP request method you want to use.
URL: The endpoint URL. It is possible to use merge fields from your automated flow participant here.
Headers: Supply your headers such as an API-key.
Content-Type: The content type of your body.
Body: The payload to send. It is possible to use merge fields from your automated flow participant here.
Store response data on the particpant
It's possible to store data from the response to the automated flow participant by mapping response data fields to participant properties. This makes it possible to use data from the response later in the flow by using participant property merge fields in SMS or email content, or by using the data in condition steps for making decisions.
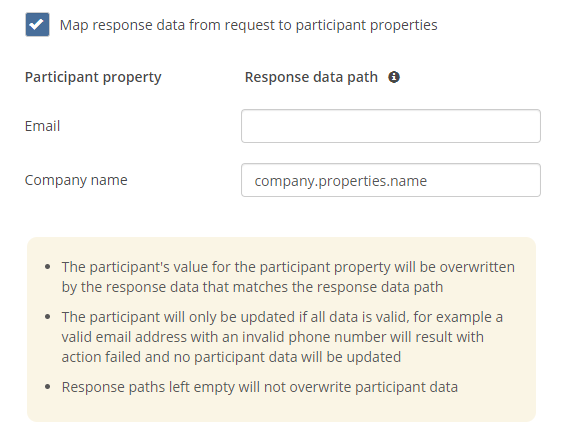
Response data path
When creating a mapping between a participant property and response data you need to provide a response data path. This is done through a JSON path that uses dot notation. For example, if you want to access the data for a promotion code property and your response data looks like this:
{
    "company" : {
        "properties" : {
            "name" : "Lime Technologies",
            "employees" : [...]
        }
    }
}
Retry settings
Both the Participant Refresh and HTTP Request has the possibility to retry failed calls.
Retry on fail
If a step makes an external request, there is a chance that the call will fail due to temporary downtime. This setting makes it possible to perform retries for the case the update fails. The retries is limited to a chosen time interval.
If the action fails
This setting decides what's going to happen if the step fails (after possible retries have been performed). The following possible actions exist: Continue and End flow.
Continue - lets the participant continue to the next step in the flow.
End flow - ends the flow for the participant, no more steps will be executed for the participant.